As you are reading this site then there is a good chance that the primary reason you bought a DD-WRT router was so that you could share your VPN connection with all family members or staff, and with all devices in your house or office. That’s great, and DD-WRT is excellent for it, but that fancy router of yours can do a lot else besides.
We have already looked at how you can share a USB drive over your network using DD-WRT, so that it can act as a NAS, so now we’ll look at another very popular use for a DD-WRT router - sharing a printer over the network. This is very easy to setup, and has the advantage over sharing your printer via a PC connection that no computer has to be turned on (only the router) or connected to the printer (this is particularly useful if everyone uses laptops or mobile devices, and you have no static desktop workstation).
If you'd like to learn more about DD-WRT, then we'd recommend reading our Definitive DD-WRT Guide
Setting up a shared printer in DD-WRT
We used a flashed Asus RT-AC66U router, but any DD-WRT router with a USB port should work.
1. Plug your printer into the router, and turn it on.
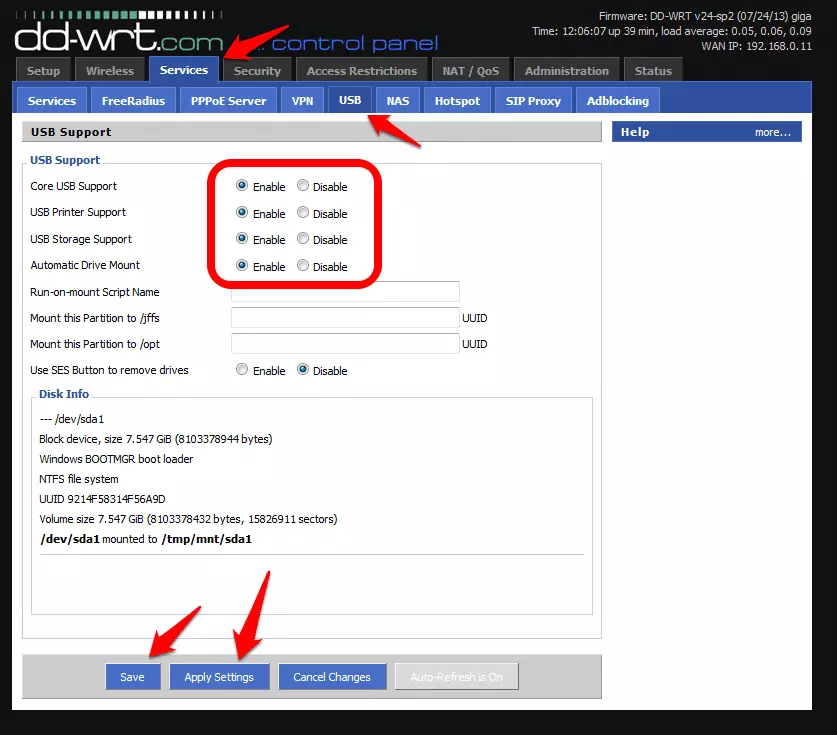
2. Enter your router config page by typing the router IP address (usually http://192.168.1.1/) into your browser address bar. Click on the ‘Services’ tab, and then the ‘USB’ tab.
3. Enable ‘Core USB Support’ and 'USB Printer Support’ (if you also want to plug in a hard drive to use as NAS storage go right ahead and enable ‘Automatic Drive Mount’ too - see here for more detailed instructions). ‘Save’ and ‘Apply Settings’.
The printer is now ready to use by any computer or devices on the network. To do this you need to follow standard procedure for adding a network printer for your OS. Below is how you do this in Windows 7.
To add a DD-WRT shared Printer in Windows 7
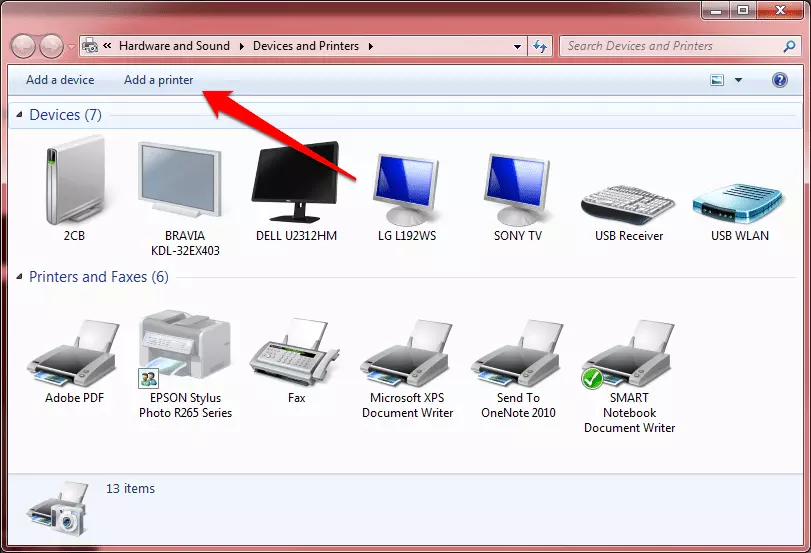
1. Go to Start -> Devices and Printers, and select ‘Add a printer’
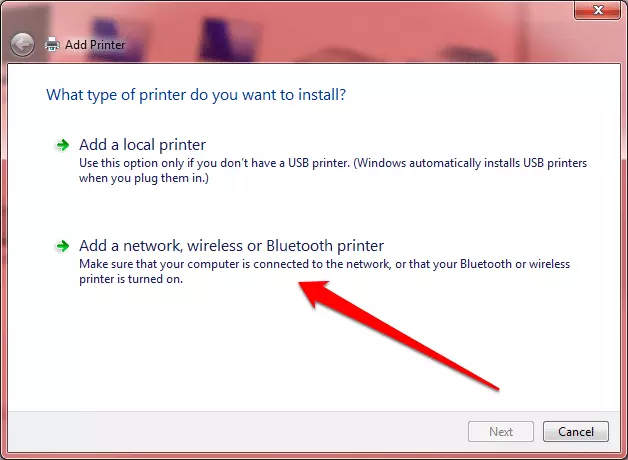
2. Select ‘Add a network, wireless or Bluetooth printer’.
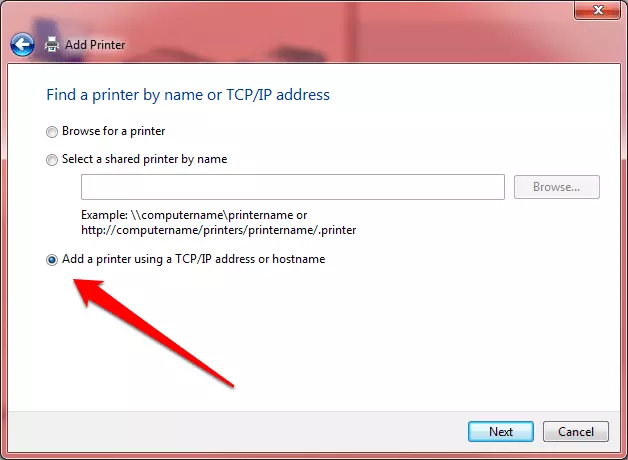
3. Click on ‘Add a printer using a TCP/IP address or hostname’
4. Enter your router’s IP address into the ‘Hostname or IP address’ field. Deselect the ‘Query the printer and automatically select the driver to use’ checkbox.
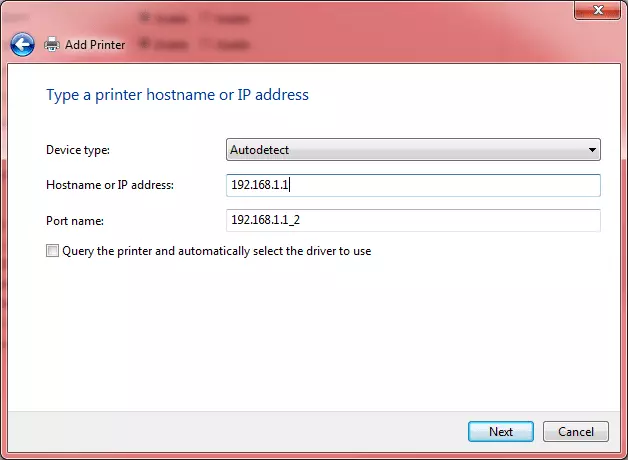
Because we have used this port before, Windows adds an extension to the Port name, which is fine
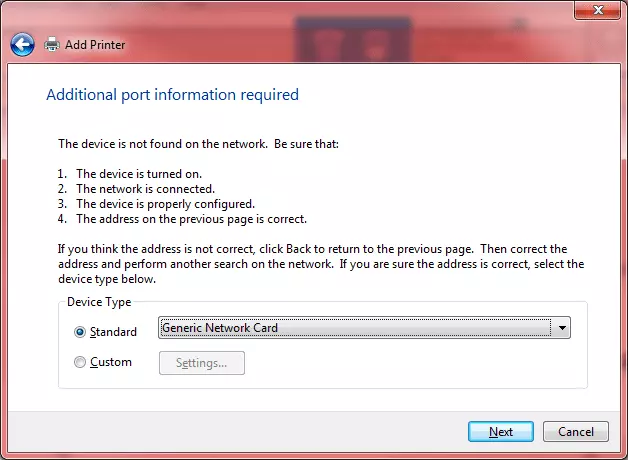
5. Wait for Windows to try to detect your printer. It will probably fail, so click ‘Next’.
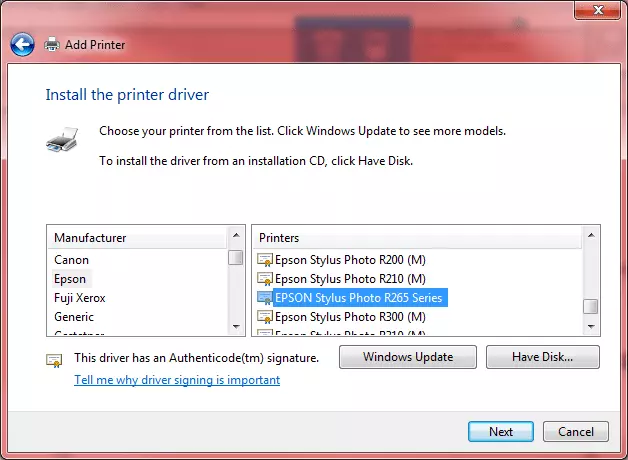
6. Select your printer make and model from the list.
7. Give your printer a name.
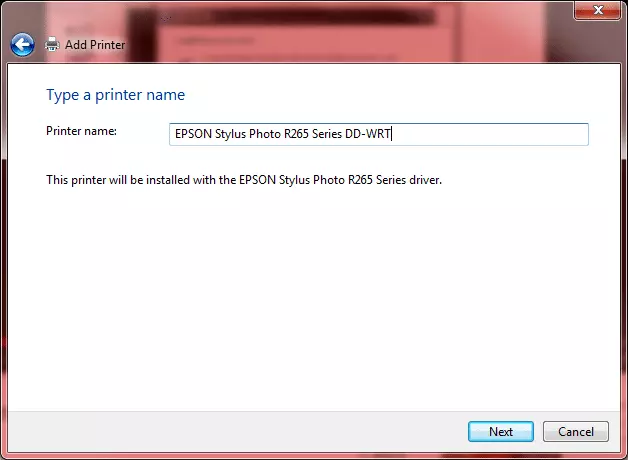
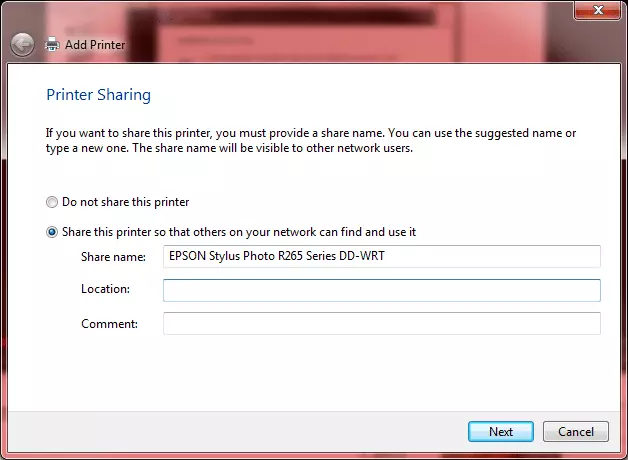
As our reader Micah has pointed out (see comments), it is better to select 'Do not share this printer' here (then click 'Next').
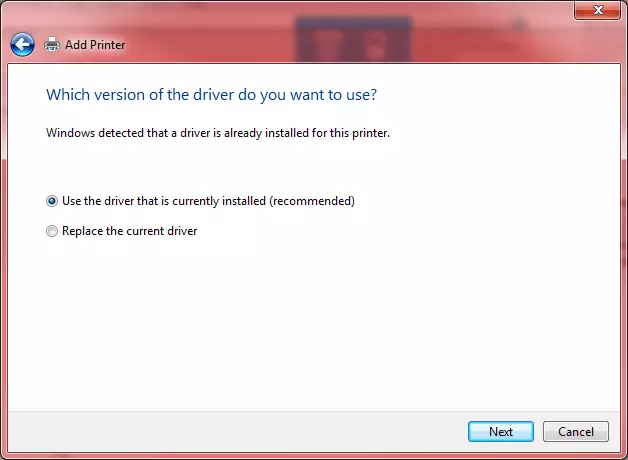
8. If you already have a driver for the printer installed then you are fine keeping it.
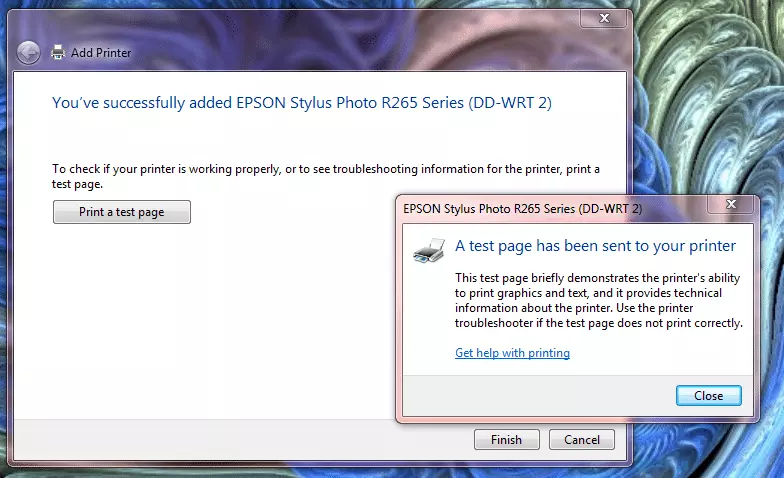
9. ‘Print a test page’ to make sure everything is working properly, the click ‘Finish’ and you are done!
