It started simple. I wanted to create a mining rig with fans attached so I could run it quieter and cooler.
It turned into a full-fledged project where I ended up building the ultimate mining rig with huge fans and copper tubing - with most of the wiring running through the copper tubes (of course, you can use it as a regular computer as well). I'll show you how you can too, and what's in store for version 2!
The Finished Version 1
Have a look at the video to see version 1 in action. If you want to see how it was built, make sure you read the article, and find out about the improvements I will make to it in the future.
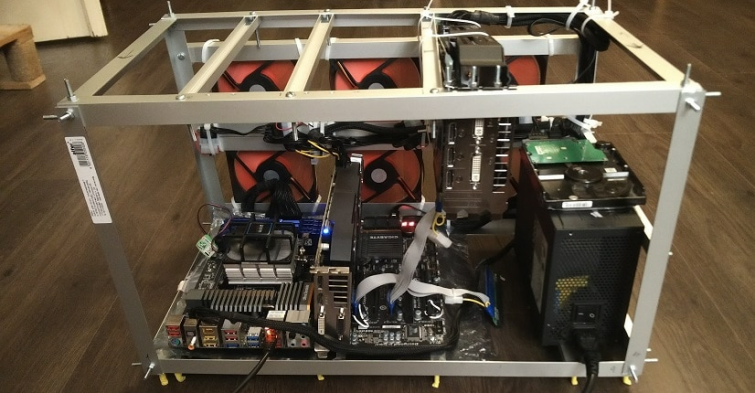
I'm not sure why, but I decided that I wanted my new rig to be beautiful as well, and naturally (!), copper tubes came into my head. One thought led to another, and, of course, I decided that the cabling should be routed through the copper tubing as well just to make everything extremely tidy. It was now time to plan!
The Plan
Before undertaking such a massive project it was time to plan. I took my trusty Autodesk Inventor out and started planning. Luckily, I was able to get nearly all the materials I needed from GrabCAD or the Autodesk Library itself. Therefore, it just came to thinking everything through. I had a paper plan of where all the wiring will go and where they will enter and exit the frame. I also needed to create a 4-way joint, which would need to be CNC milled as, unfortunately, there is no copper tubing standard for this.
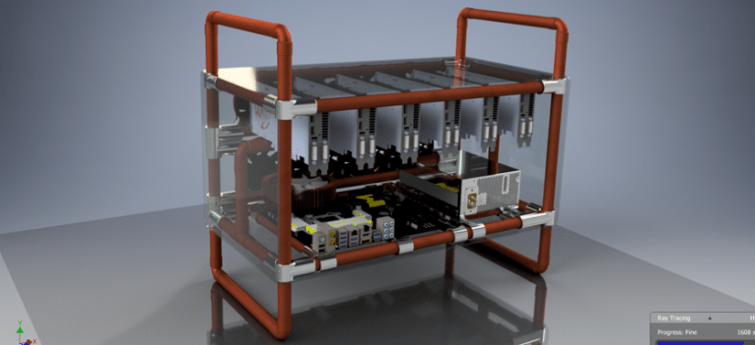
Like with any project, there is always something you miss during CADing. Luckily, the plan I created was somewhat flexible and the finished product still looks great! One of the key difference that you can spot, is that originally I planned to use chrome joints that are used for creating display units. However, in the end, I realised that it's much more efficient and better to use standard copper pipe joints.
Sourcing the Tools & Materials
With the plan in place, all that was left to do was source the materials and assemble. While I'm making it sound easy, sourcing the materials is relatively easy, and you can have everything within the week. However, trust me when I say that assembly is not. You will have nightmares about cabling afterward.
Tubes and Aluminium Joints
The copper tubes and connectors are easy to source. These are standardized sizes and you will be able to find them in most hardware stores. Unfortunately, the aluminum pieces can be trickier. Fortunately, I have a friend with a CNC machine and we made the 8 corner pieces within 2 days using the CAD file that I created. I will be uploading these files to GrabCAD shortly, however, you can also use 3D printing or even wood to create these.
You will also need to create holes and slots in your copper tubes to allocate for wire entrance/ exit, mounting screws and GPU rests. You can do this with a stepped drill bit, or you can get them professionally machined for around $100. Additionally you will need some steel wool to clean the tubes, a tube cutter and some PVC tape.

Computer Parts & Software
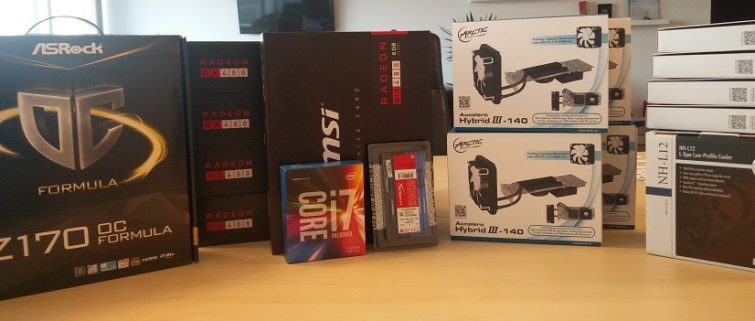
You will need to gather all the computer parts that you will require. Since I'm using this frame and build as a mining rig, this is how I made my purchasing decisions. You can read more about Ethereum Mining here, to find out more. Also, for the operating system I ended up using ethOS as it's perfect if you want to mine Ethereum, Monero or ZCash.
Fans
For the cooling for version 1, Noctua was kind enough to provide me with eight 140mm case fans and a CPU cooler as well. Not only am I extremely happy with the performance of both of these products, but they also match the colour scheme perfectly! To top it off, they also provided me with anti-vibration mounts, which allows me to run the fans silently and without transmitting vibrations to the frame.
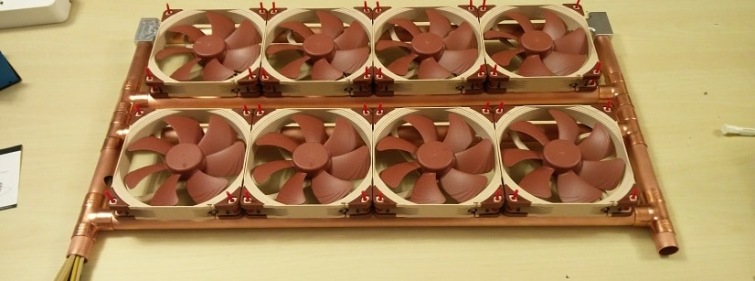
For version two, I will be adding AIO water cooling courtesy of Arctic.
Wiring
Since none of the connectors (par the fan pins), can fit through the copper tubing as a whole, I need to create my own wiring. For this, you will need everything from sleeving, to pins, to covers, and even heat shrinks. I've found that Mod-One has a lot of great options and content, but aren't necessarily the cheapest.
With regards to tools, you will need a lighter, wire cutters/ stripper, a crimping tool, and a soldering iron.
Everything Comes Together
Step 1: Building your mining rigs' base
Once all the materials were in place, and the copper tubes were machined, it was time to start the assembly. The easiest method for this is to start at the bottom with the CPU and PSU mounts. This was relatively easy to do. Sometimes the fit between the copper tubes and the joints will be slightly loose, so use some PVC tape or electrical tape to create a tight fit.
Unfortunately, because the wiring runs through the rig, you aren't able to glue the mining rig together until the very end.

Step 2: Mount the Motherboard, PSU, and GPU
When the base was assembled, I checked to make sure that I was able to fix the motherboard to the rig in a stable manner. I realised that the Noctua chromax anti-vibration mounts were perfect for this job. Their typical fans mounts were also ideal for readucing the normal vibrations from the PSU. I loved the fact that both of these matched the colour of the copper, even if this was unintentional.

Once I had the base section complete, it was time to move onto the GPU mounting. One of the factors that I didn't account for in my CAD design, were the length of the PCI extender cables. That is to say the lack of length. This meant that I had to reduce the height of both the back rest and the front suspension positions. Luckily, this was very easily done and just required the pipe cutter.
However, in the end, for the front section to have the same overall height as the fans, I did need to add additional T-joints and another horizontal cross bar.
Step 3: Assemble the Full Frame
The next step is relatively easy, assemble the rest of the outer frame and make sure that things are as close to symmetrical and level as possible.

Once you're happy with that, mount the fans in the back section, as shown in the image previously. This is when you'll need to start wiring, as all the fan wires will need to go through the copper tubing. When you're doing this make sure you have a system of annotating the different wires (e.g. colours or numbers), so when it comes to joining up cables you do it correctly and don't short-circuit your system.
Step 4: Wire up the GPUs
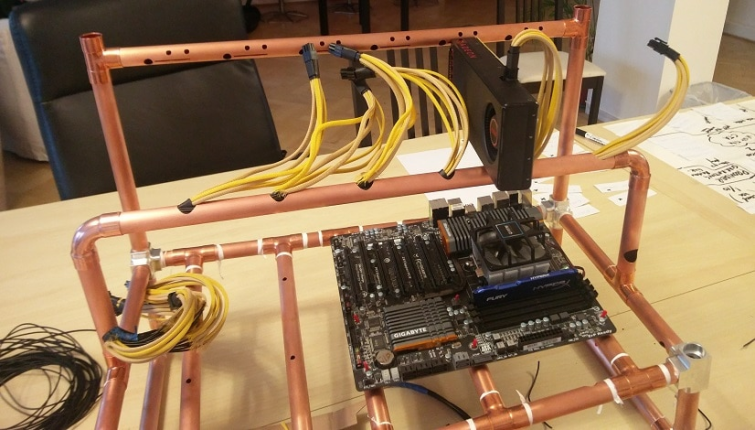
This is the hardest step. While in CAD I tested that 36 wires would fit more than easily enough through the copper tubes, I didn't account for the sleeving not the reduced diameter in the bends. Therefore, inside the copper tubes, the wires have no sleeving.
Initially, I cut all the wires to the same length and sleeved their ends. I then put these through the copper tubes until they reached the exit. Then I placed the PSU in place and cut each one of them to the required length. If you haven't marked your wires, you will need to give each one a small tug to find out which one is which so that you connect the pins correctly.
I also placed some ferrite rings within the copper tubes to reduce electric fields.
Step 5: Test the system
Once I had all the wiring in place, it was time to test the system. For the testing, I used an old PC, so that if anything went wrong, I wouldn't be wasting expensive equipment.
I started off with the fans. Unfortunately, I had some issues with the connectors coming apart within the tubes, which required me to disassemble the whole fan section. In the future, I will splice the wires together instead of using an extension cable.
Then, I tested each of the GPU wires with an old 7950. Luckily these all worked perfectly. In the future, though, I will use some wire combs just to keep the wires looking nicer near the GPUs.

Step 6: Final Assembly
With everything working it was time to assemble the full rig. This was the easiest job by far as all it required was the slotting together of the tubes and connectors.
Strep 7: Your Mining Rig Build is Complete
Once I gave the rig I final test, I applied a tiny amount of super glue to the joints. I made sure to only use glue in joints where there weren't any wires, to avoid it eating through them. Also, I avoided some core junctions so that if I had to fix anything I could take it apart easily.
However, you can glue the whole mining rig together if you'd like. With the application of a tiny amount of heat, the joints should come apart easily.
That's it; the beauty is complete.
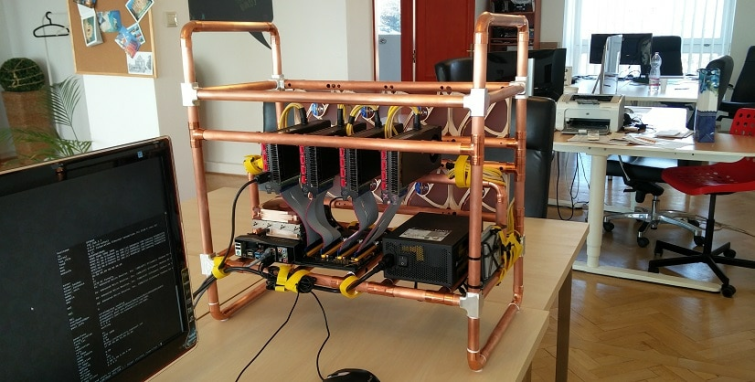
Not only did the end result end up looking great, but with the fantastic Noctua fans, I was also able to achieve excellent cooling and considerably lower running temperatures.
Version 2 will be coming shortly, and here are the changes that I'll be making.
- The GPUs will be cooled using the Arctic Cooling Accelero Hybrid III system.
- 100% of the wiring will be through the copper tubes
- Cable combs for the wires
- Significantly reduced size
If you'd like to find out about it, then subscribe to our newsletter and follow us on our social networks.
Have any feedback? Let me know in the comments.
Love the project and the idea? Share it with your friends!
