
Social media is an integral part, of life today even as many of us look to limit the time we spend engaging with it, it's still very much embedded in our lives. That is why social media privacy is something that everyone should pay careful attention to. The risks of not doing so are great, hackers, scammers, ex-partner, identity thieves, sexual predators, there are plenty of people we might want to block out of our online lives.
In this social media privacy guide, we'll outline the dangers and provide step-by-step actions to help you protect yourself and keep your social media secure.
Social Media Privacy Overview
It’s worth pointing out that while the social media platforms tend to offer plenty of functionality to lock down profiles and improve privacy, they rarely activate those settings by default. There are a couple of reasons for this...
- Sites and apps are naturally more attractive and appealing to new users when things are kept simple.
- It is not in the social media companies’ interests to keep everything private. The more information is freely available - the more info they can sell to advertisers.
- Making posts and pictures default to "public” access means it’s easier for people to use the platforms to snoop into the lives of others - which is what makes these platforms compelling to many people.
With that said, social media companies do attempt to keep their platforms as secure as possible, and they do tend to provide users with a host of options to give them control over their privacy.
General Advice
Strong Passwords and Password Generators
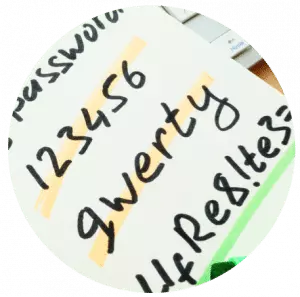
Despite extensive press coverage of hacks, scams, and cyber attacks, a survey conducted by The Telegraph in early 2017 revealed that many internet users continue to use laughably insecure passwords for their online accounts. Some passwords in the top ten include 123456, qwerty and password.
Your passwords are the key to your online accounts and making them easy to guess is opening you up to all kinds of problems.
Of course, generating and remembering complex and unique passwords for every single online account is easier said than done.
One way to come up with long and complex passwords is to use personally memorable phrases consisting of several words (sometimes adding numbers and punctuation if the service requires it).
It’s surprisingly easy to come up with these random phrases individually, and they are hard to crack from a technical perspective.
If you’ve never been hacked before, you’ve been incredibly lucky because two-thirds of US adults have already had their social media privacy breached at some time. It could be your turn soon, and, if you are using "123456” or "password” to protect your personal information - you are partly to blame!
Password Managers
Next, let’s look at how you can manage all of your complex, unique passwords.
The most basic form of a password manager is the kind built into your web browsers. An example is Google Chrome’s Smart Locker Apple’s iCloud Keychain. You’ll no doubt be familiar with these from when they frequently ask if you want your web browser to "save your password.”
Saving passwords in a browser is convenient, but it’s often not secure. If you share a computer without a secure login of your own, it’s almost certainly a bad idea.
Using a browser-based password manager is no substitute for using a proper, dedicated password management solution. A good password manager will help you generate secure passwords and keep them stored away safely encrypted. Used correctly, this means you can be even more secure by creating separate unique passwords for everything without a superhuman memory.
Here are some options you may wish to try out:
KeePass
KeePass is an open-source password manager with extensive features. However, it is not the most straightforward thing for non-techy people to set up. On the plus side, it is completely free and the perfect tool if you wish to manage a number of passwords.
KeePass integrates with all leading web browsers and mobile devices, and, because it is open source - it offers access to a vast range of extra plug-ins such as biometric support and integration for online backup services.
KeePass is described as passport safe, and that’s precisely what it is. Even if its techy approach daunts you because it is free it is well worth a test run.
LastPass
LastPass is one of the world’s best-known password managers. It is available as both a free product and a low-cost commercial offering. The free product has certain restrictions, but still has lots to offer. The paid version adds useful extra functions such as encrypted online storage and support for two-factor authentication.
Where LastPass really excels is in its ease-of-use. This makes it an excellent choice for novices. Unfortunately, there’s always some trade-off between ease-of-use and security, and it is fair to say that privacy experts dislike some compromises the firm has chosen to make, such as making an Emergency Access feature to let people regain access to their account if they lose their primary password.
StickyPassword
StickyPassword is another password management solution with the choice of a free or premium version. Features like cloud backup, synch and premium support, make it worth splashing out a small fee on the premium version.
StickyPassword has excellent support for fingerprint scanning and is a superb solution for both desktop and laptop computers as well as mobile devices. Encryption is military grade, and local Wi-Fi synch keeps everything secure.
While a password manager application isn’t essential when it comes to social media privacy, it does make it easier to have unique complex passwords for each account. With plenty of free options available, it is well worth setting some time aside to test one out.
Two Factor Authentication
Two-factor authentication is a widely used method for making online accounts more secure. It’s used by banks, social media sites, and all kinds of other online services.
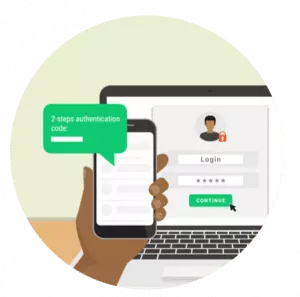
It is almost certain that you already use it in some way. The simplest explanation is that it uses something you have as well as something you know. Without both of those parts, you cannot gain any access.
An oft-used analogy for this is when you use a cash card at an ATM. The "something you have” is the card, and the "something you know” is the PIN code. With only the card, you can't draw money out of a machine, and the same would apply if you only hold the PIN.
Many websites and online services use this principle to allow you to add extra security to your accounts. It is important to note that in the case of social media, activating this kind of two-step verification is encouraged, but usually optional. Thus, it is a quick and easy feature for bolstering your security which ensures that nobody can hack your account by guessing the password. Implementation varies on different social media platforms...
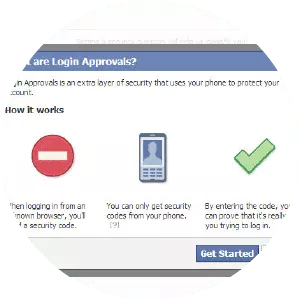
On Facebook: There a range of options. To find them, log in to your account, go to "Settings” accessed via the downward arrow on the top right of the page, and then click on "Security and Login.” Now click the "Edit” button to the right of "Use two-factor authentication” to access all the options.
The simplest option lets you use your mobile phone as the second "item” in the two-factor authentication process. You can either choose to receive an SMS message containing a unique code or use the Code Generator feature (hidden away in the Facebook mobile app) to generate a code when you need one. In both cases, you can’t log in from somewhere new without both your password and the code.
Facebook offers various other advanced two-step verification options, including one-off passwords for Facebook apps on games consoles and other devices. Plus integration with universal security keys. 2FA is easy to set up and instantly boost your social media privacy by making it far harder for hackers to break into your account.
You’ll find a guide to all of Facebook’s options here.
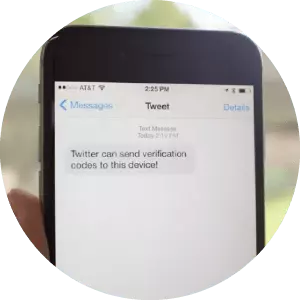
On Twitter:The settings are similar but less sophisticated. The principle is the same; you supply Twitter with a cell phone number and activate two-factor authentication. This forces Twitter to require a one-off passcode (sent by SMS to that number) each time you log on.
To access this setting you will need to be logged into your account on a computer. The settings menu is in the top right. Click "Settings and Privacy” and then tick the box that says "Verify login requests.”
When you do this, it is worth checking the "Mobile” menu to double check that you have the correct mobile number set up - otherwise, your login codes could be sent to the wrong number. If you have trouble finding the options or wish to set up two-factor authentication using Twitter’s mobile app, there’s a guide here.
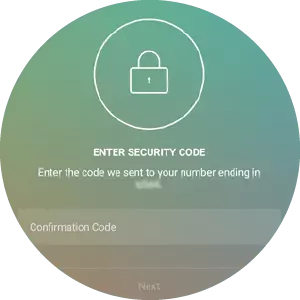
Instagram:Here two-step authentication is almost the same. However, because Instagram is primarily a mobile app, you must implement the extra security from your phone.
Open the Instagram app and go to your profile. Access the settings menu by tapping the "settings” cog. Tap "Two-factor authentication” and switch on "Require security code.” Again, you’ll need to make sure Instagram has your correct mobile number, or you could risk locking yourself out of your account. If you have any trouble finding the options, there’s a guide on how to do this here.
Two-factor authentication is also available on Snapchat. Like other networks, the feature requires you to receive a one-off numeric code via SMS. To switch this feature on, open Snapchat on your mobile device and tap the Snapchat icon in the top left. Next, tap the "settings” cog icon in the top-right, select "Login Verification” and follow the prompts. You can also use Google Authenticator (more on this later).
It is well worth taking the time to activate two-step authentication on all of your social media accounts. It only takes a couple of minutes, and, is arguably the easiest way to boost your security significantly.
Facebook Privacy

Dangers of Facebook
Criminals often make use of Facebook to gain information about people's lives and location. Despite this, studies reveal that a significant percentage of users still fail to adequately adjust their privacy settings. This is frightening considering that there are 270 Million fake or fraudulent accounts on the platform. So what are the main dangers of Facebook?
Most people want to share photos, statuses, and experiences, with their friends and families - but not with the entire world. The danger begins with users who fail to review their security settings and elect to share with a far wider audience than it is safe to do so.
Unfortunately, the dangers don’t just relate to photos being shared. The sheer number of fake accounts on the platform illustrates just how many criminals people are circulating on Facebook. Some may even be posing as your friend after cloning their accounts. Which is why you must always be wary if you get a friend request from someone you thought you were already friends with.
The intentions of dishonest users vary wildly. Some are burglars trawling the network for people who are away on holiday. And, on the darker end of the spectrum are fraudsters and sexual predators using the platform to prey on vulnerable people. As I previously discussed in my guide to online safety for children, there are some shocking statistics surrounding the proportion of youngsters who are approached by strangers online and the number of teenagers who go on to meet those strangers in real life.
The dangers of social media are very real, which is why it is vital to boost your social media privacy...
Facebook Privacy Settings
Let’s check how "locked down” your Facebook profile is. If you’ve never altered your privacy settings before, you may be surprised to find out just how much of your life is public.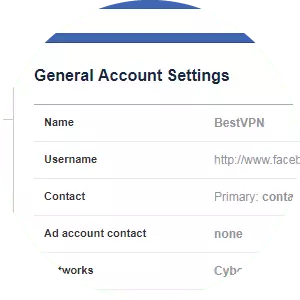
Log on to Facebook on your computer and go to your profile page. Click the "...” (three dots) icon to the bottom right of your header picture and select "View as…” You’ll then see your profile as "Public.” This allows you to see everything a random Facebook user would see if they found you via Facebook’s search facility.
If you’ve made the effort to lock down your account before, you may only see your header image and current profile picture. However, it’s more than likely you’ll also find that there are some photos, comments, and perhaps even statuses visible to the world. In many cases, what you see may shock you. If you are wondering why this is - there are plenty of possible reasons. You may have photo albums (such as smartphone uploads) where the photos are automatically set to "public” view, or you may have your account set up in a way that other people can post to your timeline without permission.
If you’re one of those people who hides some activity from certain "friends” on Facebook, you can also use the option at the top of this screen to view your profile "as” a specific friend, so you can confirm what they see.
Armed with this information, you will have a good idea of what you need to do to start increasing your social media privacy on Facebook, so let’s run through the most important settings.
The Privacy Settings and Tools Options
Most of the key settings are found in the "Privacy Settings and Tools” options. You get to this by clicking the small downward arrow in the top right-hand corner of the Facebook webpage, clicking "Settings” and then selecting "Privacy” on the left-hand side.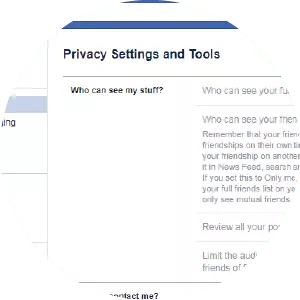
In settings, on the right, you can select who can see your future posts (choosing from "Public,” "Friends,” "Friends (except certain people)” and various other custom options.) You can make a similar choice regarding who can contact you via Facebook - and who can look you up via your email address or phone number.
It’s actually quite easy to lock your Facebook privacy down. Start by limiting post visibility to your chosen friends, limiting "friend requests” to "friends of friends” and restricting who can look you up to only "friends.” This makes you as private as it is possible to be on Facebook. However, it is worth noting that there really is no way to go "off grid” on Facebook. If this is what you prefer, it is best to avoid the platform altogether.
Having changed these things, you may think you’re done, but there’s another important step. After changing your settings use the "view as…” function described above to check whether there is still some content that can be publicly viewed. You will find that changing those settings hasn’t helped to conceal anything that you shared publicly in the past.
To fix this, return to the "Privacy Settings and Tools” options and make use of the "Limit past posts” feature, which should allow you to block the public (or "friends of friends”) from seeing old post. Again, it is worth checking the "view as…” function again - until you’re happy with what a member of the public sees when they arrive at your profile. If need be, you can go into any remaining individual posts and photos and manually change their visibility as you require. Please note that, as per this link, your current profile and picture is always available for public view.
It’s important to remember that reviewing your Facebook privacy settings isn’t something you should treat as a one-off task. Sometimes Facebook changes their default privacy settings and makes them less private - so it is worth checking your settings from time to time.
Other Things to Consider
There are a few other important settings worth looking at, but before that, it’s worth considering a clear-out of your "friends.”
If you’re someone with hundreds (or even thousands) of Facebook friends, you may wish to consider the wisdom of making your online friendship so easily available. Not only are you potentially sharing the minutiae of your day-to-day life with a wide circle of people, but you’re also giving all the friends of your friends a window into your life. This may not bother you, but it’s something to think about. If you want real social media privacy, it should start with being protective about who you are willing to let into your online "circle.”
Timeline and Tagging Options
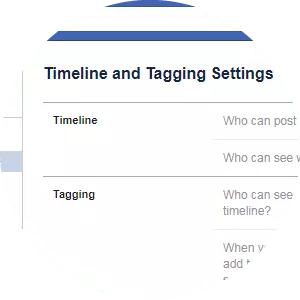
Next, it’s worth looking at your "Timeline and Tagging” options, located underneath the privacy settings in the same left-hand menu.
Here, you can select who can post to your timeline, whether you have to review their posts before they are published, and who can see them once they are up. Most of these options have an "only me” selection so that you can have full control over what gets added to your Facebook presence. These never default settings, so you will need to play around with your settings to stop people from adding embarrassing content about you without your knowledge.
It’s also well worth looking at the "Blocking” options to add people who you don’t want going near your Facebook profile. If you are ever hassled, harassed - or made to feel uncomfortable by anyone on Facebook - always add them to your blocked list.
Locking Down your Apps
Another important Facebook setting to look at is in the left-hand menu - in the "Apps” section.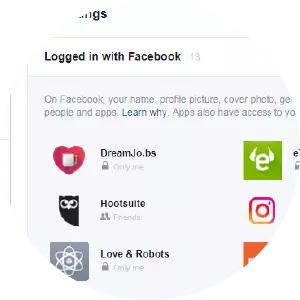
As you probably know, thousands of apps link to Facebook. Many enticing games, or popular "which Simpsons character are you?” style quizzes, for example.
The problem with many of these apps is that they request significant access to your Facebook account. Often people don’t realize just how much privacy they’re compromising when they let games access their profile.
To take a look at all the apps that have some level of access to your Facebook account, look in the right-hand section of the screen when you go into the "Apps” menu under "Settings.” For each of the apps, you can click the tiny pencil icon to see which parts of your profile it has ongoing access to. In many cases, you’ll probably be shocked to find out.
The best method for dealing with this is to remove all the apps that you no longer use and to have a good look at what permissions you’re granting to those you wish to keep. If you feel an app is encroaching unnecessarily on your privacy, then get rid of it.
Always give serious consideration to the tradeoff between providing Facebook access to apps and games and compromising your privacy. Is it really worth sharing everything you post with a faceless company for the sake of playing an online game for a few minutes here and there? Often it isn't!
Twitter Privacy

Dangers of Twitter
Twitter is a different beast to Facebook, but many dangers remain the same. When it comes to privacy on Twitter, you have one fundamental decision to make - whether to make your tweets private and, therefore, only visible to people following you - or to tweet publically and allow everyone to follow your account.
The whole point of Twitter is to share thoughts and feelings with the world. Plenty of people pride themselves on the number of followers they have and are delighted when that number increases.
This introduces similar dangers to those present on Facebook. If you choose to tweet details of your holiday and you allow anyone to see your tweets - you are potentially advertising your empty home to burglars. Essentially, the more personal information you choose to share, the more you are compromising your privacy. Thus, if you have a Twitter account, that’s open to anyone you must constantly make judgment calls about what you are willing to reveal. For example, you may want to consider refraining from sharing your hometown on your Twitter profile.
One specific Twitter danger that hits the news constantly is the risk of online trolling, bullying, and threatening behavior. This is often directed at celebrities, politicians and other high-profile people, but anyone may fall victim. One report from 2017 revealed that female UK politicians received over 25,000 abusive messages in just six months. While it is possible to block Twitter users, there’s no doubt that such behavior from trolls can cause considerable worry and stress.
Another danger comes in the form of direct messages (DMs). Often, Twitter users can receive direct messages, including web links, that lead to websites involved in criminal behavior such as fraud or phishing. It makes sense to be extremely wary of direct messages from strangers, especially those with links leading to unknown websites.
Twitter Privacy Settings
Before we start delving into the settings menus, it is important to emphasize that the key to Twitter privacy lies with your personal decisions about what to share. If your account is open for all to see, and you choose to tweet about your current location, you reveal where you are to anyone who cares to find out - and you need to decide whether you’re comfortable with that.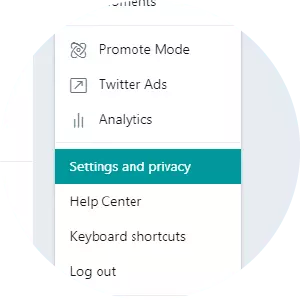
Similarly, if you wish to get involved in political discussions on Twitter (and many people do!) it’s entirely up to you how far afield you want to share your views. If those views are controversial enough to provoke strong reactions from other Twitter users, you could be opening yourself up to trolling and abuse from people with differing opinions. Of course, it’s fair to say that this kind of "debate” is part of Twitter’s appeal.
Choosing whether to Tweet Publically or Privately
As discussed above, the key decision you have to make regarding Twitter privacy is whether you want a public account or one that’s "locked down” to the followers in your circle.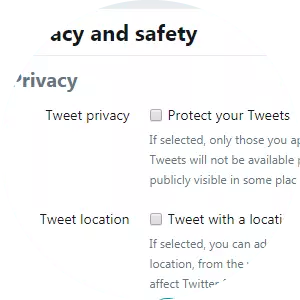
To access this setting, go to the "Profile and settings” menu on Twitter. This is accessed (on the Twitter website) via an icon in the top right-hand corner. It’s also possible to access these options via the Twitter mobile app (see more info here).
Within the "Privacy and safety” section you’ll find an option to "Protect your Tweets.” This option is NOT selected by default as Twitter makes all tweets public unless you alter this setting.
If you decide to turn the "Protect your Tweets” option on, your tweets will only be visible to followers. And, anyone new who wishes to follow you must wait until you accept their request. This locks down your account only to those people you wish to follow you. It is important to note that everyone who was following you before you activated the option will still be able to see your tweets unless you choose to block them (see below).
For further reading, you’ll find a Twitter article explaining the difference between public and protected accounts here.
Additional Privacy Settings
On the same "Privacy and safety” menu, you will find some additional settings that you may wish to tweak to improve your privacy.
One worth taking particular notice of is the "Tweet with a location” option, which controls whether you add a location to your tweets. In most cases, it is worth switching this off unless you particularly want to advertise where you are. If you’ve had this setting on in the past and decide to stop sharing, there’s an option to "Delete location information” from your previous tweets.
If you’re trying to keep a low profile on Twitter and wish to make it more difficult for people to find you, you can also uncheck the two boxes on this screen that allow people to find you using your email address and phone number.
The "Receive Direct Messages from anyone” option is another you’ll probably want to ensure is unticked. This will prevent scammers and fraudsters sending you direct messages inviting you to dodgy websites. By leaving this unticked, you ensure that only your followers can send you a direct message.
There are also a few other options in this section that are worth considering, such as not allowing people to tag you in photos, and controlling how easy it is for people to add you to Twitter team accounts.
Blocking People on Twitter
If you wish to block people on Twitter completely for whatever reason - there are two easy ways to do it.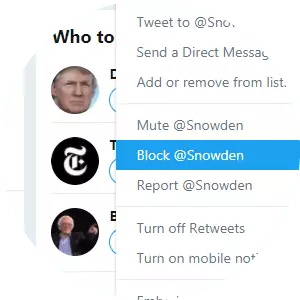
The first method is to visit their profile on the site, click the small "three dots” icon near the top-right, and click on "Block.” Once you’ve done this, they will not be unable to message or follow you. There are more details on the implications of blocking people on Twitter here.
One thing to remember if you block someone is that blocked user could still see your tweets if you have a public profile and they log out of their account. If this is a concern, you’ll need to consider whether you’d be better of switching to a "protected” account, as described earlier.
You can also block users while you’re browsing Twitter by clicking the small downward arrow next to any person’s tweet and selecting the "Block" option from there.
Twitter-linked Apps
Like Facebook, Twitter allows connectivity from a host of third-party applications. These range from apps that link to newspaper comment sections by allowing you to "sign up with Twitter” - to Twitter tools and mobile apps that allow you to post to Twitter without using the Twitter website or official apps.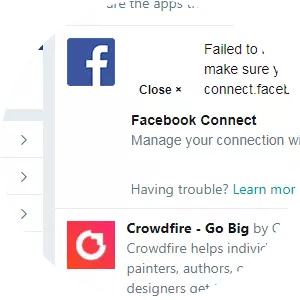
You can see what apps have access to your Twitter account by visiting the "Apps” section in the same settings menu. It’s well worth having a good look through the list and using the "revoke access” option for any app you don’t recognize or no longer use.
When you link an app to Twitter, you opt for how much access that app has. In some cases that access is minimal, but in other cases, apps are given the right to tweet on your behalf. thus, to maximize your privacy, you should minimize the number of apps that have any kind of access.
Some Final Thoughts
Tweaking your Twitter settings to enhance your privacy is a quick job, and one well worth doing. While you’re there, you should also activate the "two-step verification.”
Whether you choose to go for a full "protected” account (a good idea if you wish to keep your Twitter activity between you and a small group of friends and family), or merely exercise a little more control over a public account, the options are there - making it possible to use Twitter without compromising your privacy.
Instagram Privacy

Dangers of Instagram
Instagram is an interesting service when it comes to social media privacy because it could be argued that the majority of users are actively seeking views, likes and new followers - to an even greater degree than on Twitter.
Many users add multiple hashtags to their Instagram posts in the hope of boosting their reach to have their posts viewed by the widest audience possible. This rather flies in the face of a desire for privacy! That said, there are settings within Instagram users can review. There’s also the option of locking down an Instagram account so that it is only visible to followers you authorize personally.
When it comes to the dangers of Instagram, it is very similar to Twitter. The dangers include the risk of from trolls and criminals and the perils of revealing too much info about yourself. As with the other social networks, your overall level of privacy boils down to what you decide to share as much as the settings you select. So let’s move on to those settings now.
Instagram Privacy Settings
Instagram’s privacy settings are accessed via the Instagram mobile app. To access the settings, open the Instagram app and tap the "Profile” section (the small person icon in the bottom right.) Then tap the small "cog” icon that appears next to the "Edit profile” button to access the settings menu.
Choosing a Public or Private Account
A private account on Instagram is exactly the same as a protected account on Twitter. If you opt for a private account, nobody will be able to see your content unless you’ve approved them as a follower. In common with Twitter, people already following you at the point you switch your account to private will remain as authorized followers unless you block them. To switch to a private account, simply activate the "Private account” option at the bottom of the "Account” section of the settings menu.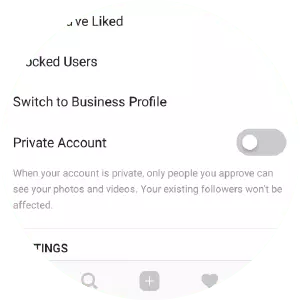
Whether you choose a private account depends on how you wish to use Instagram. With a private account, you lock out anyone you don’t specifically authorize. This is perfect if you only wish to interact with a small group of followers, such as family and friends. However, for many, this goes against the purpose of Instagram. The choice is yours.
Other Privacy Settings in Instagram
Compared to other networks, there is not as much you can control on Instagram when it comes to privacy. However, there are some additional options you may wish to consider...
In the "Photos of you” section of the settings, you can control whether people can add photos to your profile by tagging you into them. If you want the "power of veto” over these photos before they are published, then select the "Add Manually” option. (Note that "Add Automatically” is the default setting.)
Within "Story Settings” you can control who can reply to your daily Instagram stories - and also dictate whether your followers can further share your stories. This is another option that’s allowed by default that you may wish to disable if you want to boost your privacy.
Blocking People in Instagram
Blocking in Instagram works very similarly to blocking Twitter.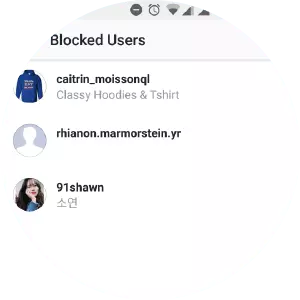
While browsing your Instagram feed, tap on the username of anyone you wish to block. This will take you to their profile page. Next, tap the small "three dots” icon at the top-right of their profile and select the red "Block” option.
You will be asked to confirm after you block each user. You are also able to review your list of blocked users in the main settings menu.
Some Final Thoughts
As with Facebook and Twitter, it’s well worth activating two-step verification on your Instagram account, regardless of what you decide to do regarding your other settings.
Beyond that, it’s really up to you how you wish to use Instagram - but even if you plan to try to become the next Instagram star or brand influencer - it’s still possible to enhance your privacy and become more sensible about what you are willing to share.
Snapchat Privacy

Dangers of Snapchat
Snapchat is a very different kind of social network, designed around a more instant type of interaction between friends, rather than the idea of building up a timeline of all your historical activity.
Snapchat has evolved quickly, having started off as a platform for messages that would "self destruct” quickly after they had been viewed. Loads of features have been added since the launch, and more are added all the time. It’s now possible to keep "stories” live on the network for 24 hours and to save "snaps” to a personal storage area. However, the basic principle of Snapchat as an "impermanent” social network still applies (You’ll find a great primer on Snapchat and its ongoing evolution here).
This impermanence of messages, coupled with Snapchat’s huge popularity amongst the younger generation, makes Snapchat a particularly worrying platform for parents with children who use it. Snapchat’s location service (Snap Map) is of particular concern, as when activated, it can make it scarily easy for other users to pinpoint someone's location. Thankfully, this feature is disabled by default, but if your young children use Snapchat, it’s definitely worth checking they’ve not activated it.
Snapchat’s dangers are similar to those of other social networks, including the risk of online bullying and trolling. What makes it unique is the temporary nature of the messages on the platform, and the fact it’s so popular with kids, yet often ignored by older people - creating the risk that teenagers may be using something their parents don’t really understand.
For this reason, it may well be the case that you need to check the privacy settings on behalf of your children (if you are a parent), rather than for your own account.
Snapchat Privacy Settings
Key privacy settings in Snapchat relate to who can see what you post. It’s possible to configure the app to make everything you post visible to anyone on the platform. Thankfully, the default settings are rather more restrictive than that. Unless you’re trying to build a personal brand, or running Snapchat on behalf of a company, there’s little reason why you’d need to share things that widely.
To check these settings, tap the Snapchat icon in the top left of the app. Next, tap the "settings” cog icon in the top-right. Scroll down the section marked "Who can…”

In this section, you can control who can see your posts or add you on the network. In most cases, you’ll want to choose "My Friends” for the "contact me” and "view my story” options. Unless you really want to show your location, it is best to leave "See my location” on the "only me” setting. So please think very carefully before activating this for a wider audience. If you do decide to allow people to see your location, it’s best to keep it to a select group of friends and family.
The final feature in this section is marked "see me in quick add.” This is rather like how Facebook suggests people you may know. This can be useful in helping "friends of friends” to find you, but for maximum privacy, it’s best to disable this feature.
Blocking people in Snapchat
On the settings menus referred to above, you’ll notice a "Blocked” section, where anyone you’ve chosen to block on the platform will show in a list.
To block someone on Snapchat, tap into their profile from the main Snapchat app window. Tap the "three lines” icon in the top-left, then select "block” from the menu that appears.
Some Final Thoughts
One additional step to gain privacy on Snapchat is to refrain from allowing the app to scan through the contacts on your device in order to suggest more possible connections. However, because this setting is engaged as part of the initial setup, it is possible that you (or your child) has already allowed this to happen.
Thus, as part of a privacy clean-up for Snapchat, it is well worth looking through the list of contacts (or doing so with your child) and removing anyone who shouldn’t be there.
Finally, as discussed earlier in the article, it’s well worth activating two-step verification for logging into your Snapchat account to improve your chances of not being hacked.
Google Privacy

Google is an internet giant, but it’s not a social network. Despite this, more than one Billion people have a Google or Gmail account, and, combined with widespread daily use of Google search - this means a huge proportion of internet users hand over huge amounts of information to Google on a daily basis. This inevitably impacts their privacy.
In the following sections, we look at some risks associated with Google and Google accounts and suggest some settings you might want to review if you want to take back some control.
Removing Yourself from Google Search Results
Have you ever Googled yourself? What you find will depend on how active you are online, and how obscure your name is. If you have a "one of a kind” name - it is likely you’ll find yourself at or near the top of the search results. Whereas, if you have a more common name - or share a name with someone with even a small amount of online fame - you may have to search a little harder to find yourself.
Regardless, you may have wondered what you can do if something comes up on Google that you feel compromises your privacy - something you would rather have removed.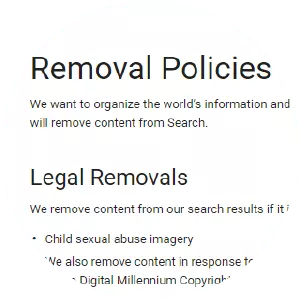
Unfortunately, it is not just as easy as deciding you want something gone from the internet, and asking Google to remove it. In Google’s official advice for managing your online reputation, the company suggests that your first port of call is to contact the owner of whichever website the content is on.

However, if the website owner can't help - Google is capable of removing certain information from the search results (if you can convince the firm that the content is causing you genuine distress). The kind of content Google will remove from search results includes things like medical details, government ID numbers and offensive images. See here for further information.
There are two points to note here. The first is that while Google can remove things from the search results, they can’t remove the actual content in question from the actual websites they reside on. Secondly, as you will see from Google’s removal policies, there are a limited set of circumstances under which the company will act on a removal request. Despite this, if you feel there is information about you in Google’s search results that shouldn’t be, it is worth invoking your right to be forgotten.
Google Accounts and Their Risks
If you use the internet regularity, chances are that Google possesses a lot of information that could potentially negatively impact your privacy.
For the purposes of this guide, we focus on Google accounts and Gmail accounts. However, it is also worth noting that if you use Google to search for things online - while you’re logged into one of your accounts using default settings - Google is likely to have a long and detailed record of your search history. If this is something that makes you feel uncomfortable, you should check out this guide for viewing and deleting your search history.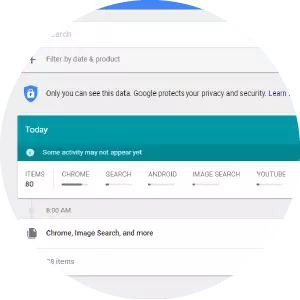
If you use Gmail, Google Drive, and/or Google Apps (especially with the Chrome browser) Google gets to track a lot of what you do online. So, let’s take a closer look at the risks posed by Google accounts...
It is a well-known fact that Google has the capability to read all of your Gmail messages and Google Drive docs. In fact, until recently, Google used the contents of emails to target advertising (one of many reasons why it sometimes seems like your web browser knows you better than you know yourself!)
This does not mean that Google employees are sitting down to read your emails - at least we hope not. However, the capability is there, and it is a clear risk to privacy-conscious individuals. It’s recently been confirmed that Google can look at documents stored and shared in Google Docs, as well as in Gmail. Ostensibly, this is so Google can root out illegal content - but it does also mean that Google isn’t a particularly private platform for email or online document storage.
Unfortunately, there’s no easy way to make these Google services more private and secure. It comes down to how much you trust the company and how comfortable you are with the privacy sacrifices you have to make. If you would rather move away from Gmail, feel free to read our guide to secure, private email services.
Google Authenticator
Google provides a host of options for performing dual factor authentication on Gmail, Google accounts, and other online services. 2FA can be set up either using SMS messages, by printing codes for when your phone isn't available, by using USB security keys or by making use of a handy app called Google Authenticator.
Google Authenticator is an app for mobile devices that continually creates and updates one-off login codes. You’ll find information on it here. You can use it as the second step for logging into Google and numerous online accounts.
If you use many websites that require a login and allow two-factor authentication, Google Authenticator can be extremely useful for extra security. TO use it, users enter their usual user name and password, and then simply refer to their phone or tablet for the latest one-off passcode. It’s really easy to set up, simply requiring you to scan a bar code for each site that you want to attach it to.
It’s not essential to use it for your Gmail account, but it's a great way to improve your security on the platform. and many others such as financial products - which often have Google Authenticator support.
Social Media Privacy Conclusion
Social media and privacy are not natural bedfellows. The information in this guide is designed to help you make privacy conscious compromises while still remaining connected socially. It doesn’t take long to work through the steps for each platform, which means you can quickly improve your online privacy. However, remember that this is a process worth returning to periodically to ensure that your settings are tight enough.
