The best way to keep your private email private is to use PGP encryption. However, the concepts involved are complex and often confusing; a problem compounded by the fact that setting up PGP encrypted email is unintuitive and poorly explained in existing documentation. This ‘how-to’ guide is aimed at making the process clearer, providing step-by-step instructions for setting PGP in Windows.
What is GnuPG?
Gnu Privacy Guard (also known as GnuPG or just GPG) is an open-source clone of the highly popular email encryption program Pretty Good Privacy (which is now commercially available from Symantec). Developed by the Free Software Foundation, GnuPG is free, open-source and completely compatible with PGP, using a full implementation of the OpenPGP standard (RFC 4880).
GnuPG works by encrypting messages using asymmetric key pairs generated by individual GnuPG users. These keys can then be exchanged with other users, and users may add a digital signature to verify the identity of the sender and the message’s integrity.
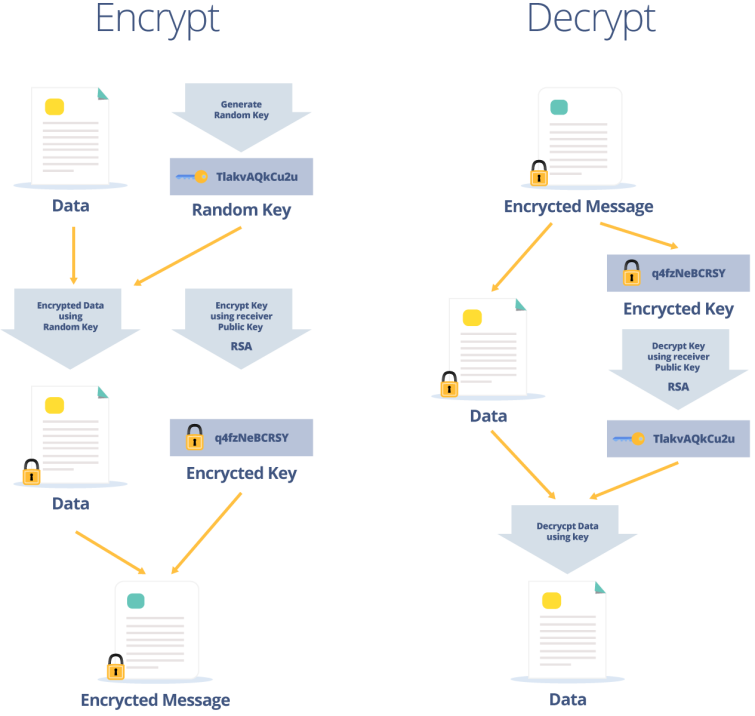
If all this sounds complicated, that’s because it is! However, once you get your head around the key concepts, it all becomes much clearer.
With public-key cryptography, each user has a private key, which they keep secret and use to decrypt emails sent to them using their public key. They also have a public key, which they freely distribute so that other people can use it to send them encrypted mail.
- Private key – kept secret and used to decrypt own mail
- Public key – distributed so that others can use it to encrypt mail for sending to you
The GnuPG website provides lots of support, but much of it is highly technical and not newbie-friendly.
Gpg4win - the Windows Version
Gpg4win is the Windows version of GnuPG, and is really a suite of utilities held together by a common installer script. The utilities are:
- Kleopatra – a certificate manager
- GPA – another certificate manger
- GpgOL – a plugin for Outlook
- GPGEX – an extension for Windows Explorer
- Claw-Mail – a lightweight email program with GnuPG support built-in
- Gpg4win Compendium – a manual
Use GPA to create a key pair
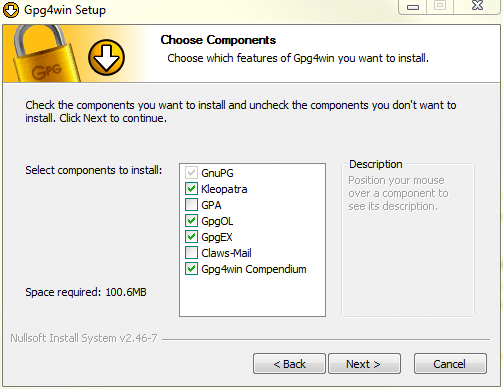
- Download Gpg4win from the website, and install it (requires a reboot). We’re going to be using GPA and Claw-Mail for this tutorial, so make sure you select them when given the option.
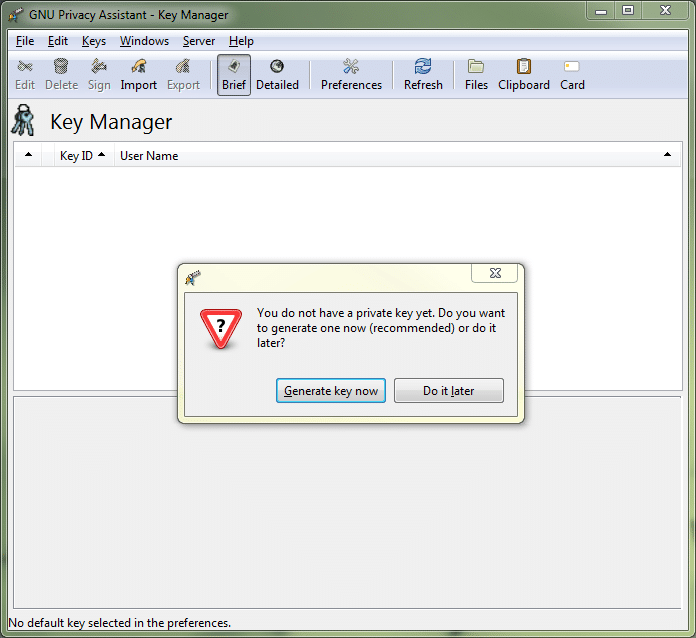
- When you first install Gpg4win you are offered very little in the way of clues about how to proceed, so the first thing you should do is generate a key pair. To do this, fire up GPA and it will helpfully offer to generate a private key for you.
![gpg install]()
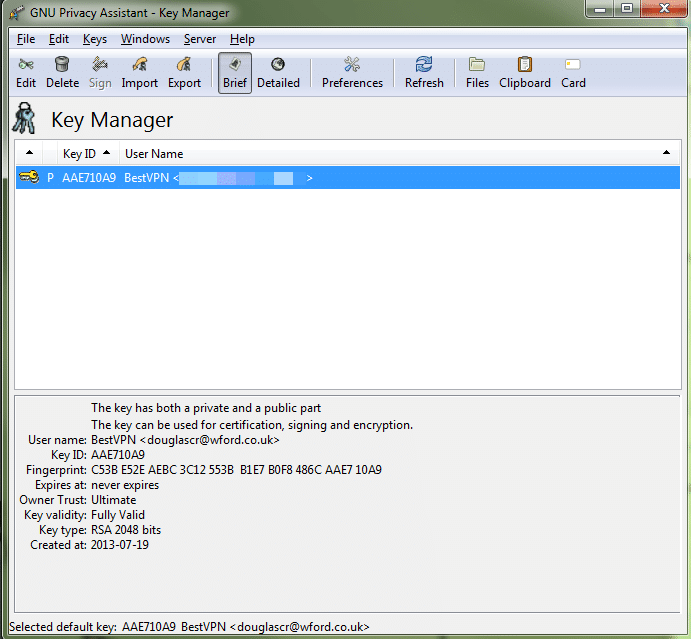
- Simply follow the Wizard, inputting your name and email address (which are used to build the key), the password you want to use, and where you want to save the key. It is important to use the same email address that you will be sending your encrypted email from, and the password is important as the recipient will need it to decrypt your files. We are going to save the key in a folder called ‘Encryption keys’.
![gpg2]()
- Congratulations! You now have your first key
![gpg gpa 2]()
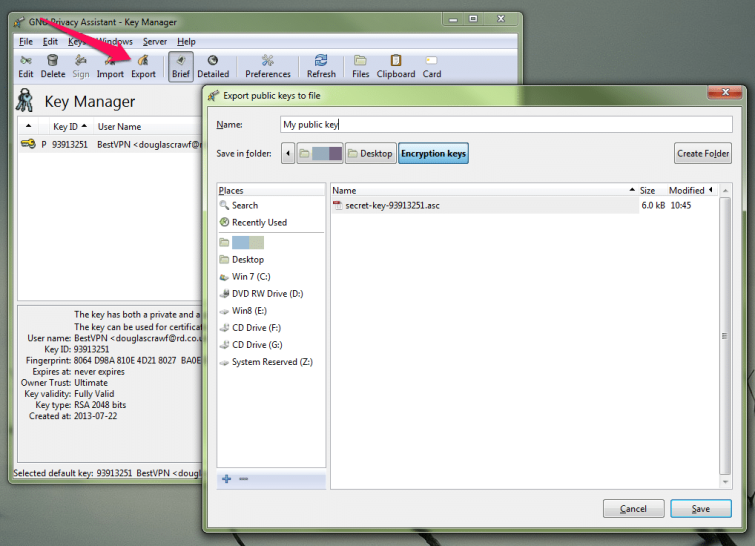
- You now need to generate a public key, so that others can decrypt files you that encrypt with your private key. In GPA select the key you have just generated, click on ‘Export’, choose a name for the public key, a folder to save it to, and click ‘Save’.
We saved it to our ‘Encryption keys’ folder. If you look in the folder you will now see a key pair – your encrypted key (to be kept secret) and your public key (to share).![gpg gpa 3]()
- Share your public key – this can be done by simply emailing it to whoever you want to send encrypted mail to. The recipient should ‘Import’ this key in their instance of GPA (or Import Certificates’ if using Kleopatra). You will also need to provide the intended recipients with password you specified in step 2.
![key pair]()
Encrypt your files or folders
You can now encrypt any file or folder, so that it can be sent to a recipient of your choice.
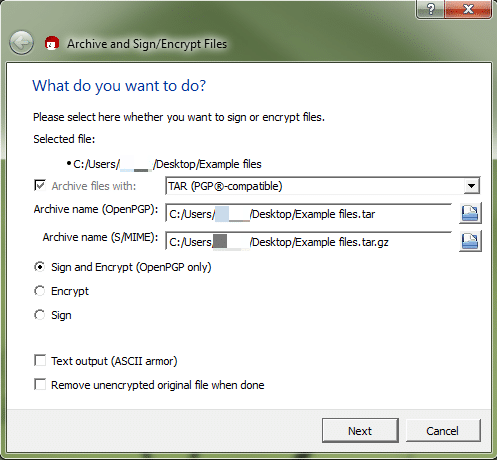
- To encrypt a file or folder, right-click on it, and select ‘Sign and Encrypt’
- Check that the file save paths are where you want them, and that the ‘Sign and Encrypt (OpenPGP only’) radio button is selected.
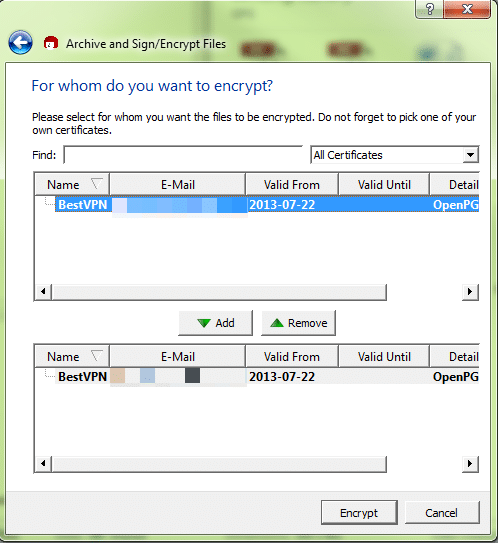
- Select the recipients you want to encrypt the file for, and ‘Add’ to the list. When you are ready, click ‘Encrypt’. For the purpose of this tutorial, we will send the file to ourselves.
![gpg sign 1]()
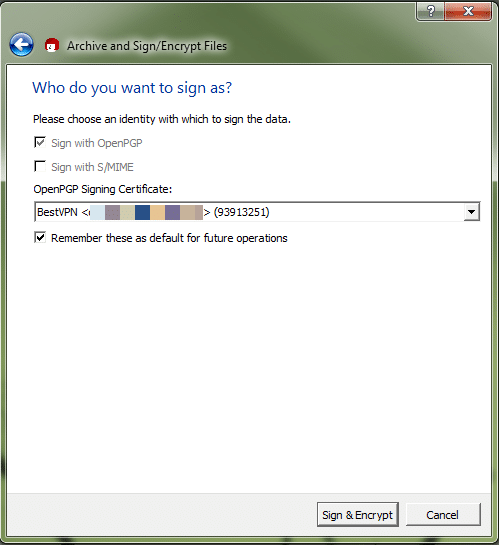
- If you have more than one identity, you can choose which one you wish to use for signing. For now, just click ‘Sign and Encrypt’. If you choose not to sign in step 2, you won’t see this screen.
![gpg 8]()
- An encrypted version of the file or folder is created (with the .gpg file extension), which can then be simply emailed to the person you want to have it, or you can decrypt it yourself.
![gpg sign]()
Decrypting a file or folder
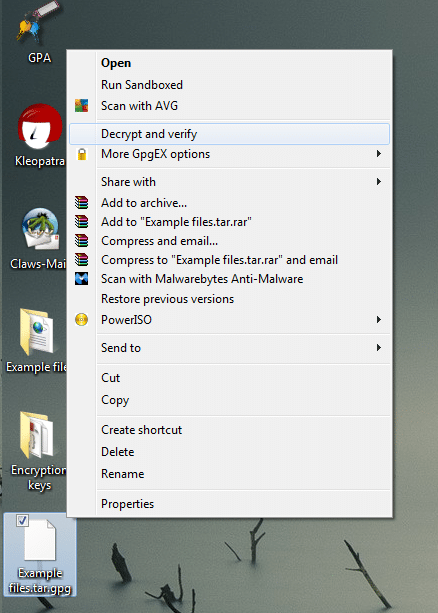
- If an encrypted file is emailed to you, Download it to a convenient location, right-click on the file and select ‘Decrypt and verify’.
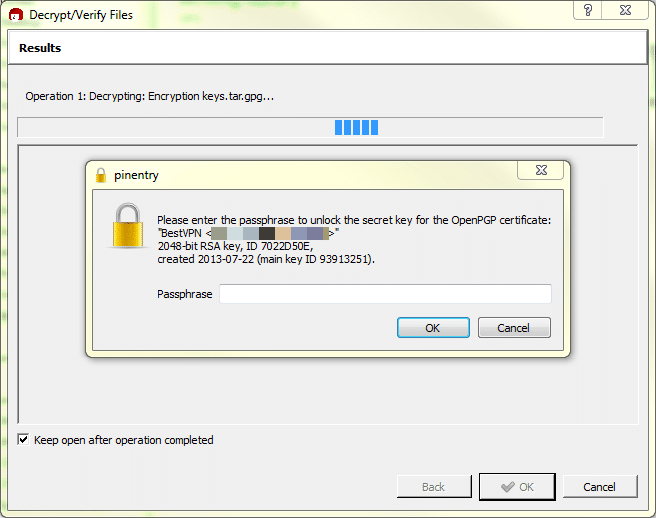
- You will be asked to enter the passphrase set up by the sender (see step 2 of ‘Use GPA to create a key pair’ above). Remember that you will also need to have imported the sender’s public encryption key into your certificate manager (GPG or Kleopatra).
![gpg 9]()
![gpg 10]()
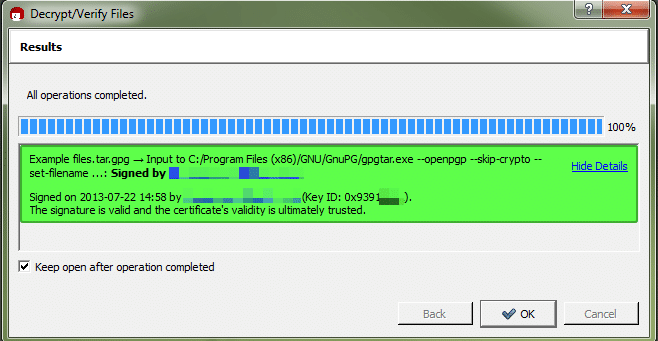
- A new folder with the suffix .tar_1 (or similar) will be created, with the encrypted files inside.
Clicking Show Details will give you more information about the certificates validity![gpg12]()
Conclusion
We’ve shown you how to install Gpg4win, how to create key pairs and use it to encrypt and decrypt files. In its raw form Gpg4win is a little basic, but going through these steps is good way to start understanding PGP encryption. In the next tutorial in this two-part series we will look at integrating Gpg4win with the popular Thunderbird email client, so that you can easily send and receive encrypted emails.

