Mailvelope is a free and open-source browser extension for Google Chrome and Mozilla Firefox which allows secure end-to-end email encryption using your browser-based webmail, such as Gmail, Hotmail, Yahoo! and GMX. In this guide, we will show you how to use Mailavelope and explain the benefits of PGP encryption.
Web-based email services are very popular thanks to their accessible and often ‘free’ nature. The problem is that they are very insecure, as you are storing your emails on a third-party server where they can be readily accessed by those running the server, or by other adversaries (such as the NSA).
This is a problem compounded many times if you use a ‘free’ service such as Gmail, as the provider (in Gmail’s case Google) scans all your emails in order to build a complex behavior model of you so it can deliver targeted advertising. In other words, you ‘pay’ with your privacy instead of with cash.
The answer to this problem is to encrypt your emails before sending them, in such a way that only your intended recipient can decrypt them on their computer (so no unencrypted plaintext emails are sent to, stored on, or received from any server).
Unfortunately, thanks to the archaic way in which email works, you should always be aware that email encryption does not encrypt everything. The email addresses of sender and recipient, date and time of sending, and e-mail’s subject line are not encrypted; just the body and any attachments. This metadata can still be very damaging in the wrong hands.
About Mailvelope
The Mailvelope extension allows you to OpenPGP encrypt your emails from inside your browser and decrypt any OpenPGP (and PGP) mail you receive. If you send mail using Mailvelope, then it can be decrypted using any suitable PGP/OpenPGP/GPG software, as long as you (the sender) have the public encryption key, and the recipient has the correct private key (and the password for it).
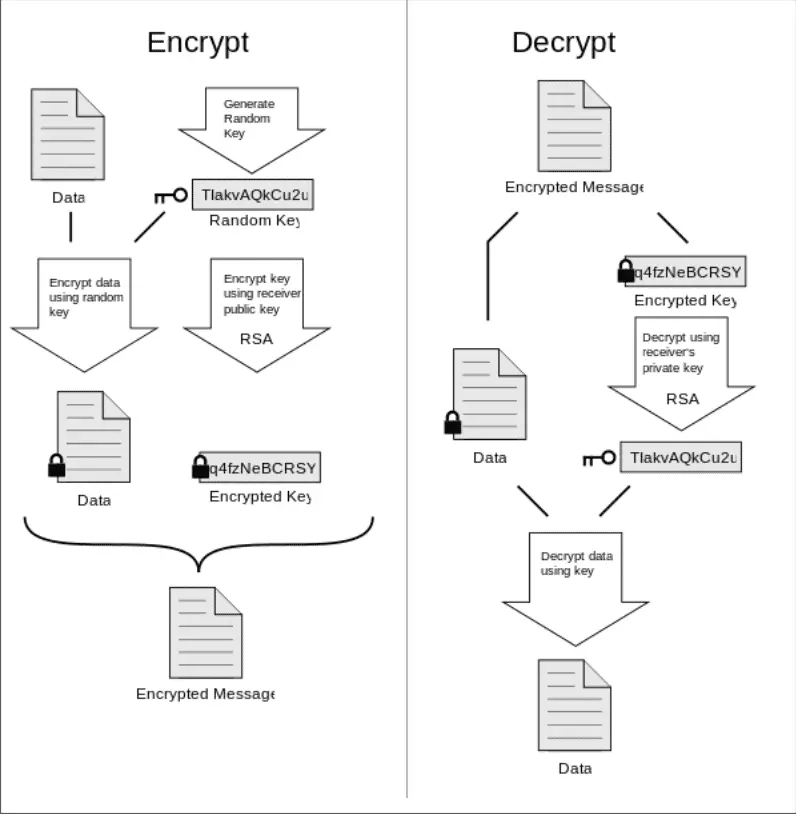
As always with PGP, setting up is somewhat complicated, and it can take a while to get your head around certain key concepts. With public-key cryptography, the most important thing to remember is that each user has a private key which they keep secret and use to decrypt emails sent to them using their public key. They also have a public key, which they freely distribute so that other people can use it to send them encrypted mail.
- Public key – distributed so that others can use it to encrypt mail for sending to you.
- Private key – kept secret and used to decrypt own mail. Keep it secure!
If you find this confusing, then the GPG4win website has a great article explaining it all. Fortunately, once set up, Mailvelope is very easy to use.
Using Mailvelope
1. Keys
We use Windows 7, Firefox and Gmail in our examples, but the process is very similar regardless of platform, browser and webmail service.
a. Follow the links from the website to download and install Mailvelope.
b. Open the Mailvelope Options by clicking on its icon in the Add-on bar (which you can turn on and off by going to Firefox menu -> Options). In Chrome a lock icon appears next to the address bar instead.
c. Generate a key pair - by going to ‘Generate Key’ and filling in the required details. We suggest using at least 2048 RAS encryption, so click ‘Advanced’ and select that (or higher). ‘Submit’ when you are ready.
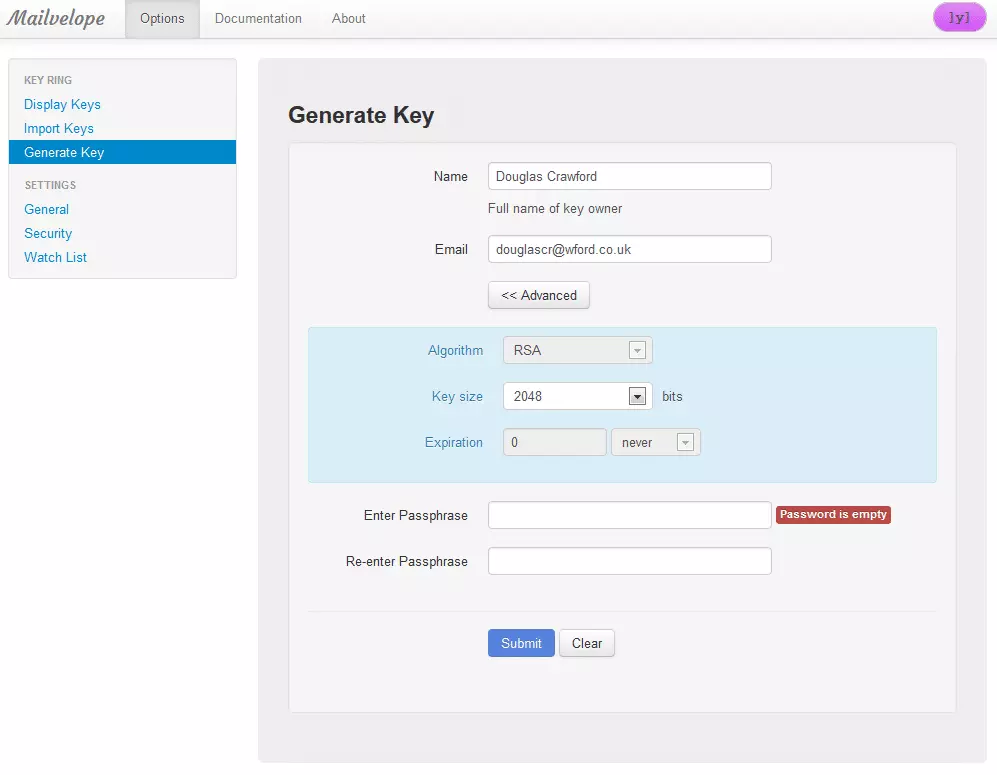
As the warning suggests, this can take several minutes and may cause your browser to hang. Be patient, and you should receive confirmation that a new key has been generated.

If you look in the ‘Display Keys’ tab you will see your newly generated key.

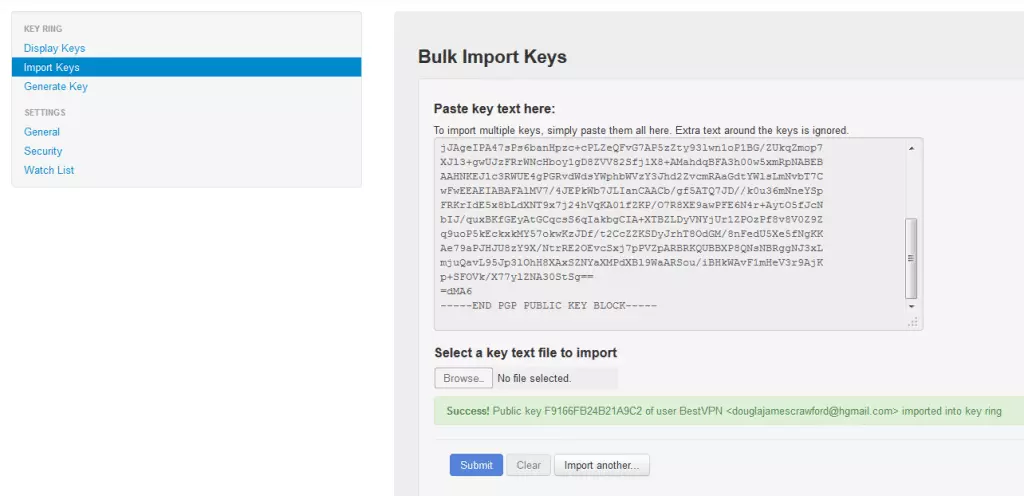
d. Import keys - If you have any existing keys, they can be imported by selecting ‘Import Keys’ and pasting in the key text or by browsing to the text file location. To send email you will need to enter recipients’ public keys here.
e. Export keys - in order for others to send you encrypted emails you’ll have to put your public key about a bit - send it to your contacts, include it in your email signature, whatever suits you.
On your Key, you can export your public key as a text file, or email it to your contacts. You can also view and export (for backup purposes) your private key (or key pair), but be sure to keep this safe.
f. Validating a key pair - this is an important step as it confirms that a recipient is who they say they are. This should be done face to face, but encrypted VoIP is another good option. Never use phones (mobile or landline) as they are simply not secure in this day and age.
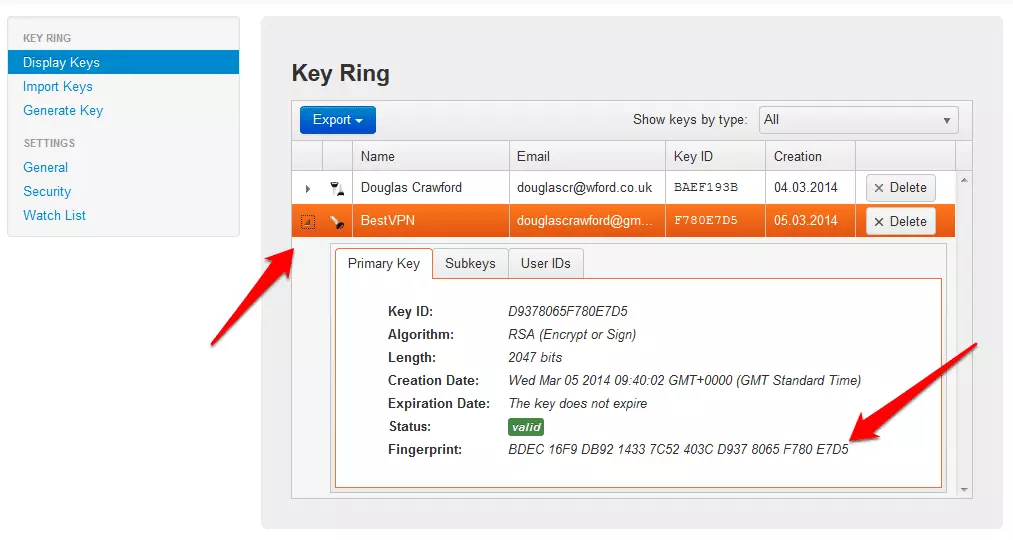
To validate a key pair, you need to confirm that the Fingerprint for each key you have matches the sender’s original. A key’s fingerprint can be found by clicking on the little triangle to the left of the key in the Key Ring.
g. Mailvelope does not currently support Digital Signing of messages, but ‘this feature is under development’. What does have is ‘Security Tokens’, a three-character code which will be prominently displayed on all Mailvelope dialogues, clearly identifying their origin so you cannot mistake them

You can customize your Security token by clicking on the ‘Security’ tab in the Mailvelope Options window.
2. Composing an email
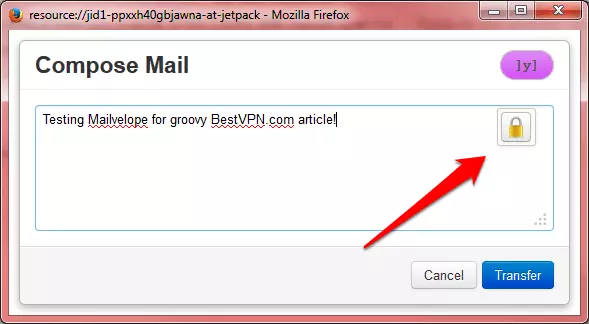
a. When we select ‘Compose’ in Gmail, the normal New Message window appears but with an additional icon in the text input area. Fill in the Recipients and Subject fields normally (remembering that is information is not encrypted). You can also enter text that won’t be encrypted in the main composition area as usual.
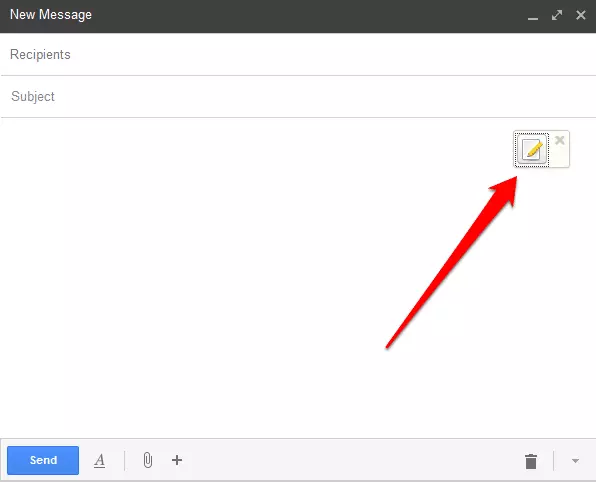
b. When you click on the icon, you are taken to a text input screen where you can enter what you want to send encrypted. When you are done, hit the padlock button.
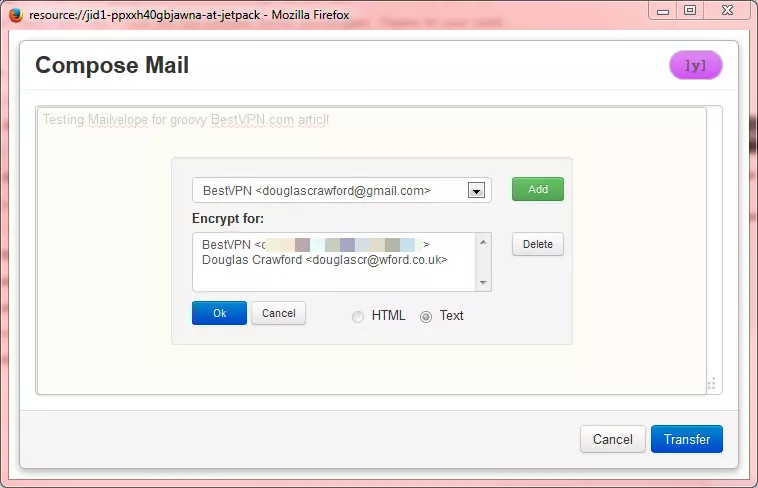
c. Add recipients - you can only add recipients whose public keys you have added to your Key Ring (see step 1d). Click ‘OK’ when you are done to encrypt the message.
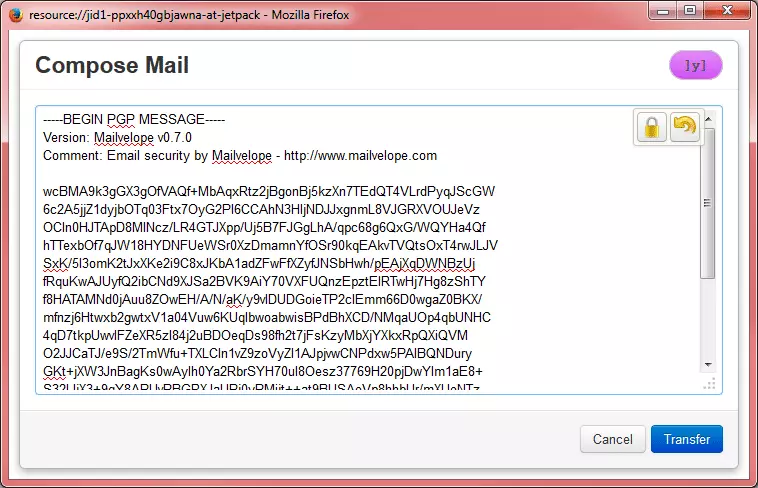
d. You will now see the email text replaced with the encrypted message. Click on the ‘Transfer’ button to incorporate the encrypted text into your email, then ‘Send’ the email as normal.
3. Receiving an encrypted message
a. When you receive a PGP/OpenPGP encrypted email it will look like the screenshot below. To decrypt it, click anywhere on the message where you see the cursor turn into a key symbol.
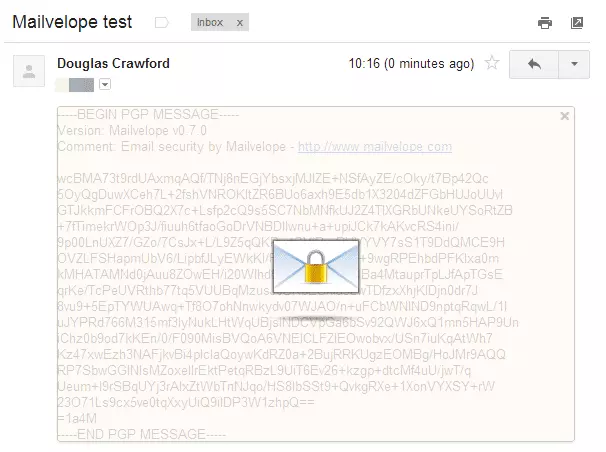
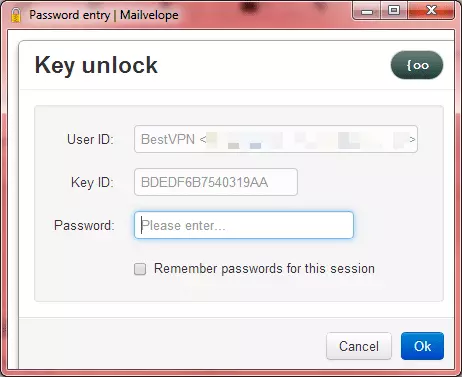
b. You will be asked to enter your own password (generated in Step 1c).
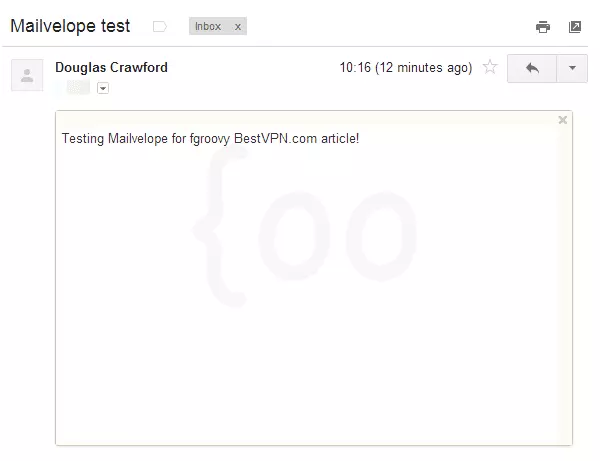
c. And ta-da! The message is decrypted!
Pretty Good Privacy
PGP was developed as a protocol for securely encrypting email, and although the original standard is no longer open-source (it is now the property of Symantec), the Free Software Foundation has taken up the open-source banner in the form of the (100 interoperable with PGP) OpenPGP standard.
The most common implementation of OpenPGP is GNU Privacy Guard (also known as GnuPG or just GPG), which is available for Windows, Mac OS X, and Linux. Although the basic program uses a simple command-line interface, more sophisticated versions are available for Windows (Gpg4win) and Mac (GPGTools).
We discuss and provide a detailed GpG4win how-to guide elsewhere, and it may well be worth reading through it to help understand how OpenPGP works. As with GPGTools for Mac, it requires the use of a dedicated email client, which, while arguably the more secure solution, many find much less convenient (and are therefore less likely to use).
Conclusion
Mailvelope is one of the easiest ways to secure your email with strong PGP and has the convenience of working almost seamlessly with most popular webmail services. The biggest problem is getting colleagues and family members to use it too, but at least its relative ease of use maybe some help in your efforts at persuasion! Also, always remember that your email Subject lines, timestamp, and the list of recipients are not encrypted.
