The Raspberry Pi is a low cost, yet surprisingly capable micro-computer that is ideal for several privacy- and security-related home computing projects. These include using the Raspberry Pi as a personal OpenVPN server (PiVPN), as a DNS-based adblocker for your entire home network (Pi-hole), as a private DNS server, and more.
Why SSH into a Raspberry Pi?
SSHing into a Raspberry Pi allows you to run your PiVPN/PiHole/DNS resolver/whatever, as a headerless server. That is, you do not need a screen or input device (such as a mouse or keyboard) to set up, configure, and maintain services running on your Raspberry Pi.
You instead access your Raspberry Pi via Secure Shell (SSH) - a secure tunneling protocol that has a great deal in common with private VPNs. Once set up, you can control your Raspberry Pi remotely from pretty much any other internet-capable device that is connected to the same network as the Pi.
Note
SSHing into your Raspberry Pi provides command-line access to the Pi. More advanced GUI access is possible over SSH using x-forwarding, but that is beyond the scope of this guide.
First: Enable SSH on your Raspberry Pi
The GUI way
This does require at least temporarily connecting a keyboard and screen to your Pi (and a mouse makes life easier).
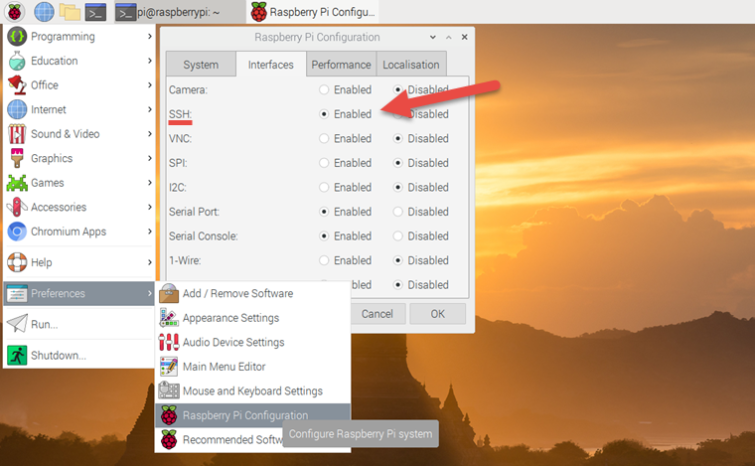
- Go to the Applications menu (Raspberry icon to the top left of the screen) -> Preferences -> Raspberry Pi Configuration and click the "Enabled" radio button for SSH.
![Raspberry Pi Configuration]()
- Click OK.
Using Terminal
Again, this requires at least temporarily connecting a keyboard and screen to your Pi (and a mouse makes life easier).
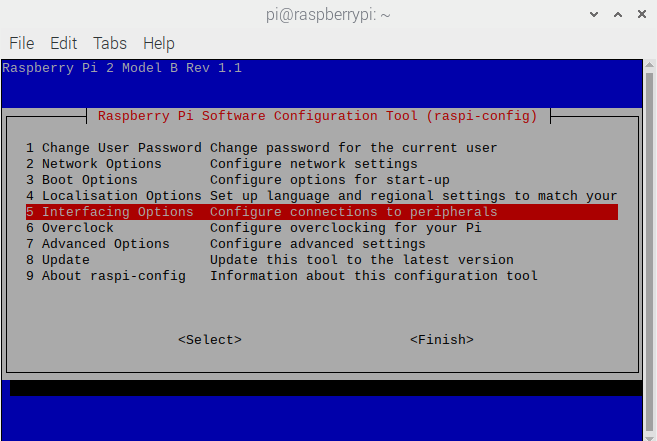
- Open Terminal and enter:
sudo raspi-config
- Use your keyboard’s arrow keys to scroll down to Interface Options and hit <enter>.
![interface options configure connections]()
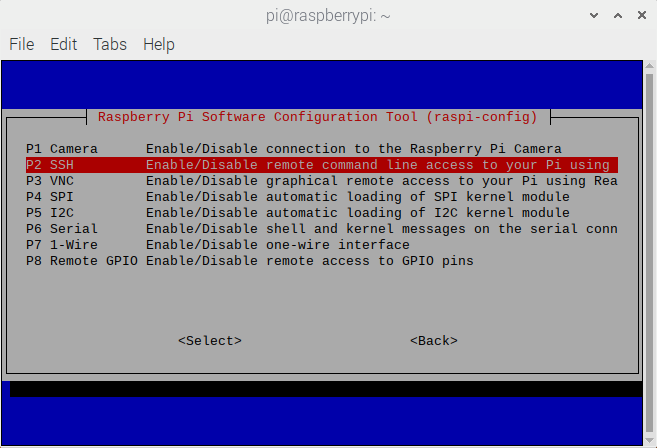
- Scroll down to SSH and hit <enter>.
![SSH Enable/Disable]()
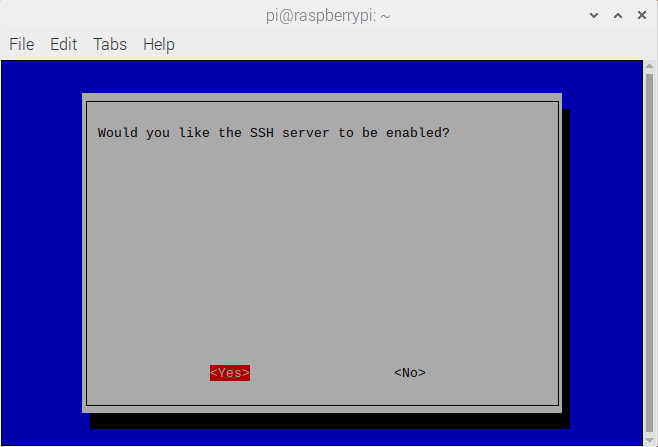
- When asked "Would you like the SSH server to be enabled?" ensure Yes is selected and <enter>.
![would you like SSH Server to be enabled?]()
The headless way
You can enable SSH on a Raspberry Pi without connecting a screen or keyboard to it.
- Turn off your Raspberry Pi and remove the SD card containing the Raspbian OS from it. Then mount the SD card on a different desktop machine.
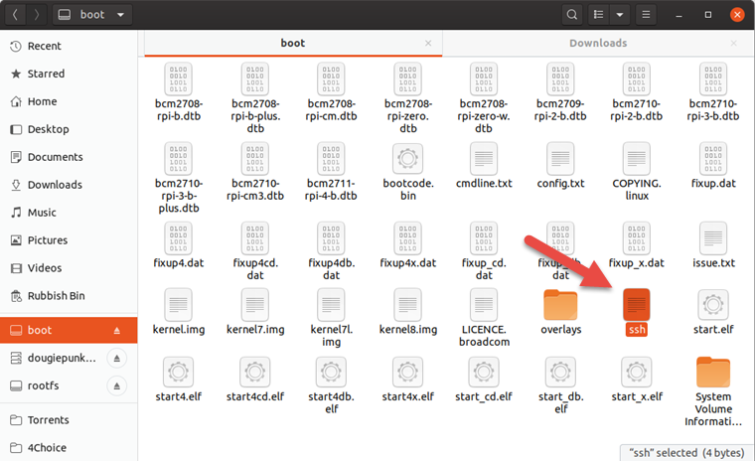
- Use a text editor to create a file called "ssh" (with no filename extension) and save it to the boot partition of the RaspbianSD card. It doesn't matter what (if anything) the file’s contents are.
![SSH file]()
- Safely eject the SD card, return it to your Raspberry Pi, and boot up the Pi. When Raspbian detects the SSH file in its boot folder, it will enable SSH.
Second: Find out the IP address of your Raspberry Pi
The Terminal way
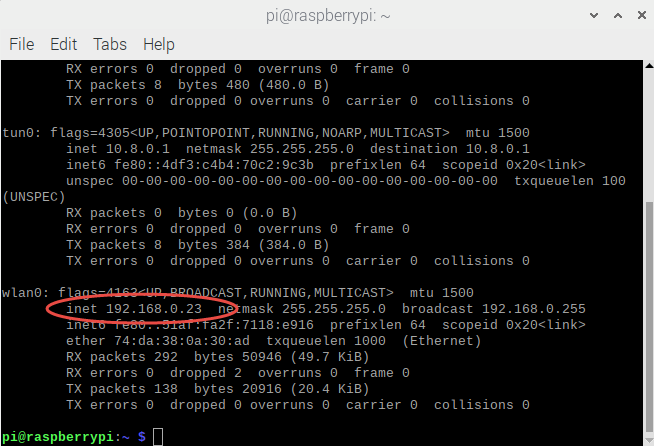
1. Fire up Terminal and enter:
ifconfig
2. Study the output, looking for a valid IP address (192.168.x.x or 10.x.x.x). If using an Ethernet connection, you should find it under eth0, and if using a WiFi connection under wlan0.
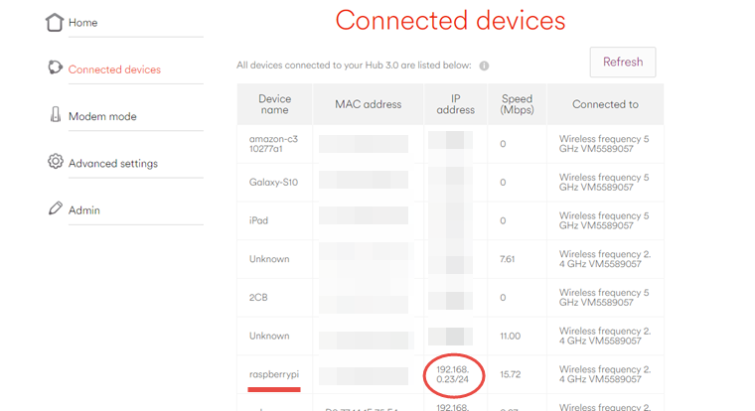
The headless way
Log into your router’s admin panel (try 192.168.0.1 or 192.168.1.1 in your browser, login details are likely printed on your router somewhere) and look through connected devices.
Third: SSH into your Raspberry Pi.
To SSH into Raspberry Pi, the connecting device must be connected to the same local network as the Pi (i.e. to the same router, although it doesn’t matter whether by WiFi or Ethernet).
Instructions are similar, but vary a little by the platform. If you receive any errors, such as a timeout, check that you have entered the IP address correctly.
The default login credentials for the Raspberry Pi are:
Username: pi
Password: raspberry
If you have changed these, then use your ones instead.
macOS, Linux, and Windows 10
macOS and Linux include a built-in SSH client that can be accessed via Terminal. Windows 10 now also includes a built-in SSH client which can be accessed via the Command Prompt/PowerShell.
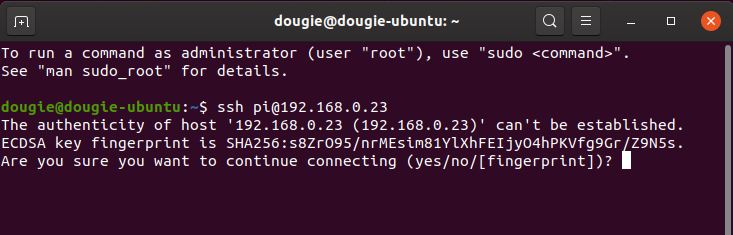
1. Open Terminal (or in Windows right-click Start -> Command Prompt or PowerShell) and enter:
ssh pi@<IP>
<IP> is the Raspberry Pi’s IP address that we found above. For example:
Note that if you have changed the Pi’s username from the default ("pi"), then enter that instead when connecting. For example:
2. The first time (only) that you connect you will receive a security warning. Type yes, then enter your password.
3. The command prompt will change to that of your Raspberry Pi.

You can now control your Pi as if you were typing directly into its Terminal window.
Windows (older versions)
In older versions of Windows you need to download an open source app called PuTTY.
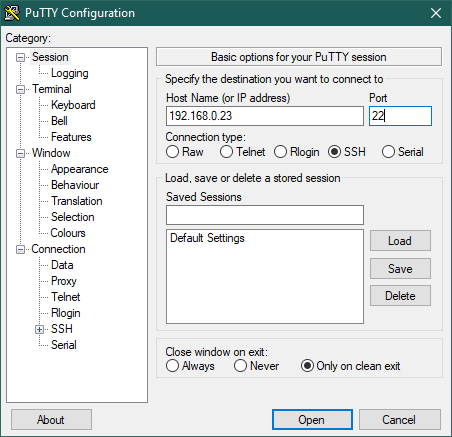
- In the Session tab, ensure Connection type: SSH is selected (it is by default), enter the Pi’s IP address into the Host Name field, and hit Open. You can leave the Port number on its default setting.
![putty configuration screen]()
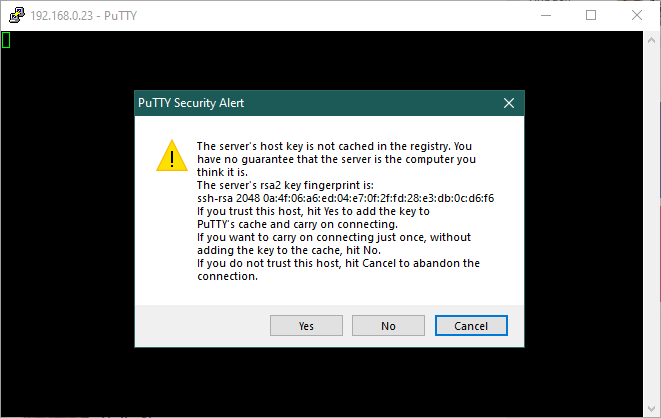
- The first time (only) you connect, you will see a security warning. Click yes.
![PuTTY security Alert]()
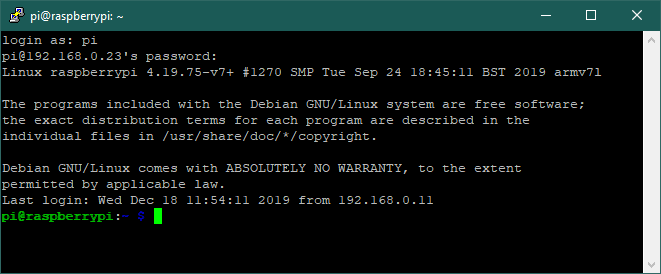
- Enter your username and password (see defaults above).
![pi ssh win other 3]()
The command prompt will change to that of your Raspberry Pi.
Android
Download and install an SSH client app. We’re going to use ConnectBot because it is open source and can be downloaded from either the Play Store or via F-Droid.
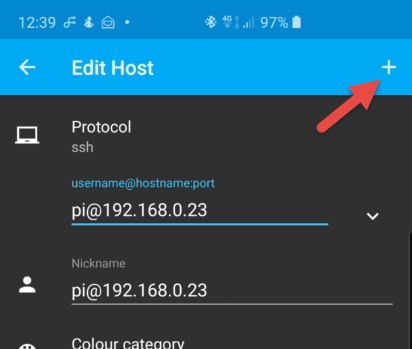
- When the app opens it will show "No hosts created yet." Click the + symbol to set up a new connection.
- Ensure Protocol is ssh (it is by default) and under username@hostname:port enter: pi@<IP>Youcan allow the app to autofill the Nickname field or choose your own. No other settings need to be changed. Touch the + button when you are done.
![add protocol in edit host screen]()
- On the next screen simply select the newly-createdhost.
![Select the newly created host]()
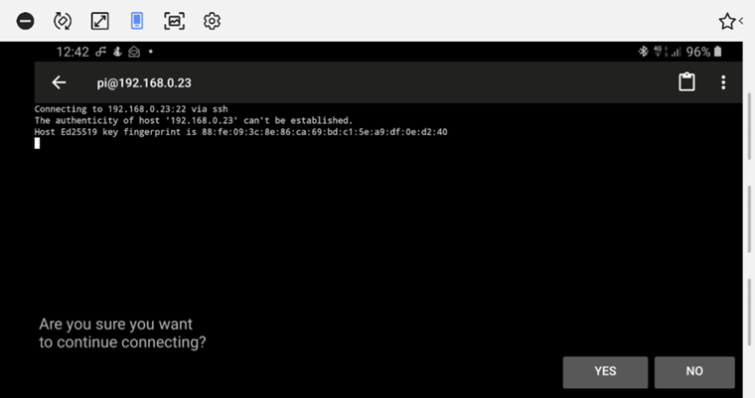
- The first time (only) you connect, you will see a security warning. Select yes.
![security warning before connecting]()
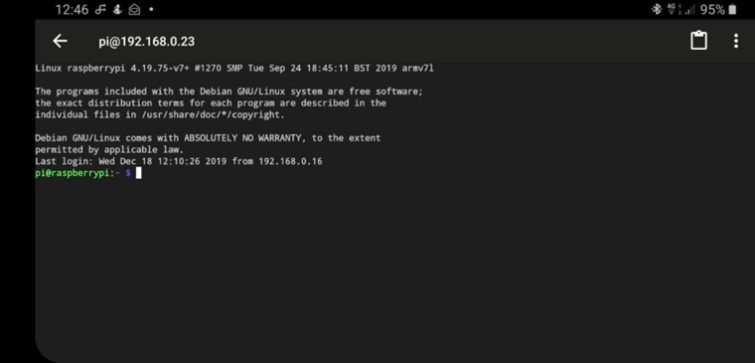
- Enter your password when requested to login to your Pi.
![enter password and login]()
The command-prompt will now be that of your Raspberry Pi.

iOS/iPadOS
Free open source SSH clients are hard to get for your iPhone or iPad, so we’re going to use the popular Terminus app. Premium features are available via in-app purchase but are not required just for SSHing into a Pi.
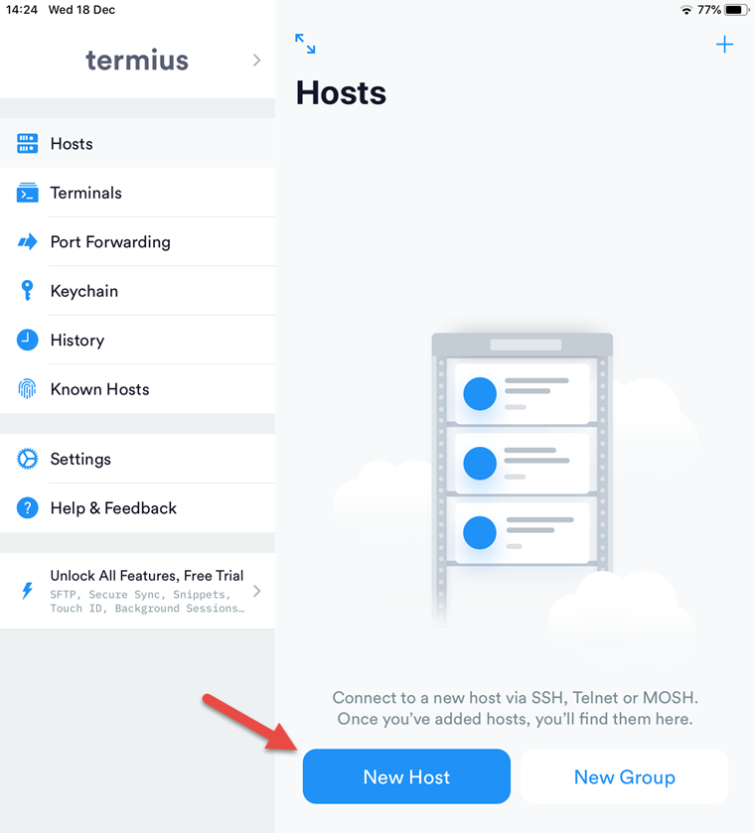
- Open Terminus (you do not need to sign up for a new account) and select New Host.
![new host]()
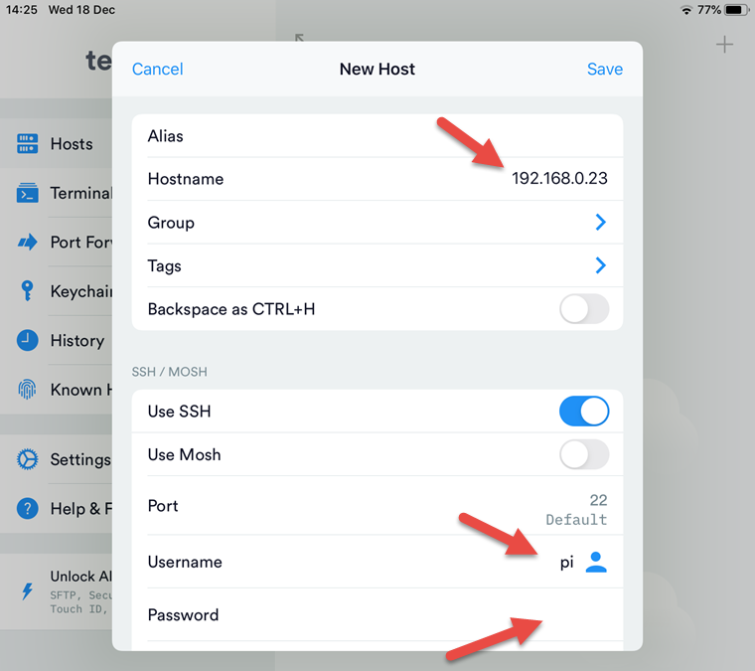
- Ensure Use SSH is enabled (it is by default), enter your Pi’s IP address next to Hostname, your Username, and Password ("pi" and "raspberry" by default). Then hit Save.
![ssh pi ios 2]()
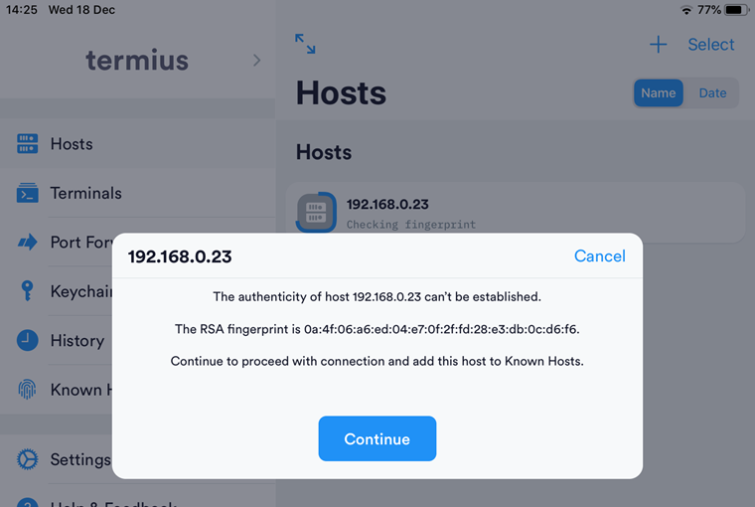
- Select the newly created host. The first time (only) you connect, you will see a security warning. Select Continue.
![select newly created host]()
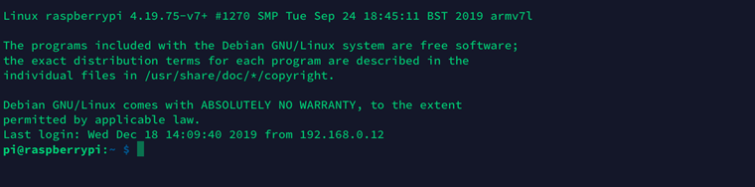
- All being well, the client will connect and you will see your Pi’s command-prompt.
![client is connected]()