Sometimes commercial VPNs aren't ideal, and you'd like to create your own VPN service.
In this guide, I'll show you how to use Hamachi and Privoxy to create your own private and personal VPN.
However, before I dive into that, let's explore the pros and cons of creating your own VPN service using Hamachi.
Why You Should Create Your Own VPN
VPN was, however, originally developed mainly to allow business employees to log in to their company’s servers securely when away from the office:
User [-> ISP ->] company server.
It is possible to set up a home computer so that it runs much like a business VPN server. Allowing you to securely remote login to your home computer, and access the internet through its IP address:
User [-> ISP ->] home computer -> ISP -> internet. (traffic in brackets [] is encrypted)
Advantages of VPN at home
- Free – there is no need to pay for a third-party VPN service
- Secures your internet connection when using public WiFi hotspots
- Can remotely and securely access content on your computer, and stream movies, music, etc. to a remote device
- The home computer acts as a proxy. This is great for accessing geo-restricted web services when away from home. It can also be a very effective anti-censorship tool if the user is in a restrictive country. However, you will need a friend who is willing to set up a home server in a less restrictive country.
Countries such as China, and for geo-restricted services for example if you wanted to watch Hulu outside the US you would need a VPN. A private home VPN is also great for circumventing school, college or work restrictions. For information about a China VPN see our best VPN for China guide.
Disadvantages of VPN at home
- The home computer acts as a proxy – you access the internet through your home computer’s IP address so any internet activity can be easily traced to that address. This also means that you cannot just change your apparent location (e.g. to a different country).
- Although the connection between your remote computer and home VPN server is encrypted, your outgoing home internet connection is not. This means that your ISP (and anyone else who is watching) can easily monitor your internet activity.
- You will need to keep your home computer on all the time, which will increase your electricity bills.
In short, setting up a private home VPN server offers many of the advantages of using a commercial VPN service. However, it does not provide privacy/anonymity when using the internet.
How to Use Hamachi to Create a Private VPN
By far the easiest way to set up a private VPN is to use LogMeIn Hamachi combined with Privoxy.
Hamachi is software that allows you to create virtual networks that operate like regular LANs.
It builds a ‘zero-configuration virtual private network’, which means that you do not have to worry about port forwarding or other complex configuration issues (which is definitely a very strong point in its favor). Transferred data is protected using 256-bit AES encryption.
The biggest drawback with Hamachi is that it is proprietary software (i.e. it is not open source). However, as we discussed above, a private Hamachi VPN does not provide much privacy, anyway. So this is probably not worth worrying too much about. If privacy is a major concern, Tor or a no-logs third-party VPN provider are much better options.
The basic version of LogMeIn Hamachi is free and is fully functional. However, only five members per network can use it. Furthermore, the free version will not run in the background on idle computers (as the paid version can).
LogMeIn Hamachi is available for Windows, macOS, and Linux (beta).
To remotely access the internet through our home PC running Hamachi, we will need Privoxy, a free open source web proxy. You could run Privoxy on its own, but all connections would be over unencrypted HTTP. This is why we are using Hamachi.
Privoxy is available for Windows, macOS, Linux, and iOS, and you can use it with any browser of your liking.
1. Setup Hamachi VPN
First, you'll need to set up Hamachi. Follow these steps to do so:
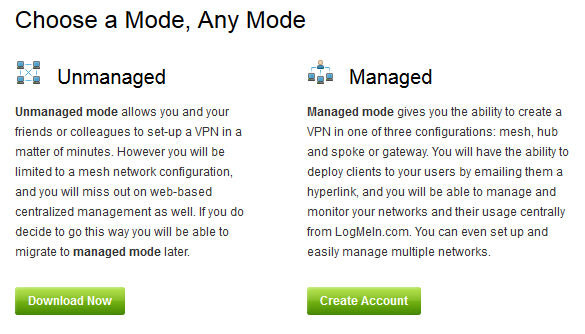
a) Download Hamachi on your home PC (choosing ‘Hamachi Unmanaged’ mode) and install. LogMeIn will nag you at various points to sign-up for a free account, but this can be ignored for now.
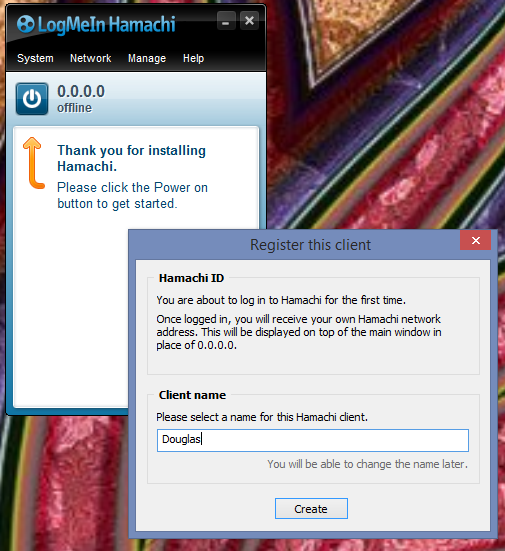
b) Click the power button to get started and enter a name for your client.
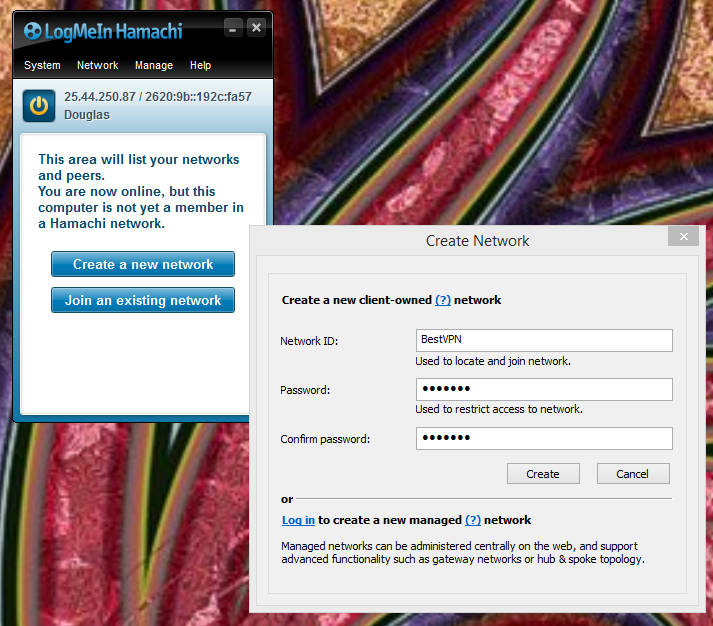
c) Hit ‘Create a new network’ and give it a name and a password. Hit ‘Create’.
d) Setup Hamachi on any other computers you to connect to the home VPN. The only exception this time is that you need to choose ‘Join an existing network’ to join the one you have just created, rather than creating a new one.
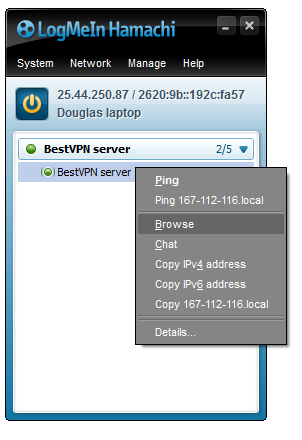
You can now Browse your Home PC, just as if it was on a local (LAN) network.
2. Set up Privoxy
You do this to allow secure remote connection to the internet.
a) Download, install and launch Privoxy. In Windows, Privoxy launches as a blank window, but don’t worry as this is fine. You can even close the window and Privoxy will continue to run in your system tray. Right-click Privoxy in the system tray, and select Edit -> Main Configuration.
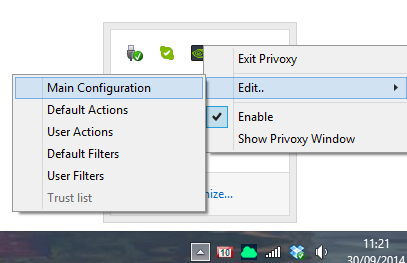
b) Notepad will open Privoxy’s configuration file, called config.txt. Go to Edit -> Find, and search for ‘listen-address 127.0.0.1:8118’. Put a # in front of the line to mark it as a comment, then below it add the line:
listen-address [the IP address shown at the top of your Hamachi window]:8118
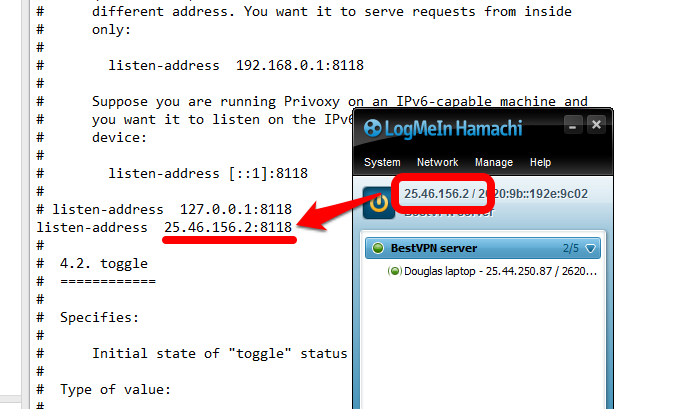
c) Save and close config.txt.
3. Setup Your Browser Proxy Settings
The last step is simply to configure your browser’s proxy settings to point to the Hamachi network IP address. 25.46.156.2, Port 8118 in our example.
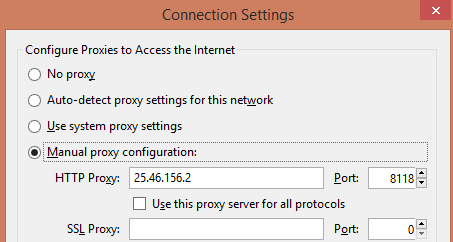
In Firefox these settings can be found by going to Options -> Network tab -> Connection Settings
You can check everything is working by typing ‘http://config.privoxy.org/’ into your remote computer’s browser search bar.

(If it says ‘Privoxy is not being used’ then something has gone wrong)
You are now using your home computer as a VPN server! All your remote browser’s traffic will go through your home computer. Therefore, you will appear to originate from the IP address of your home computer.
