In this tutorial, we show you two ways to create and use your own cloud storage solution using Nextcloud. As we discuss in our full Nextcloud review, Nextcloud can be self-hosted locally on your own hardware, or remote-hosted on rented server space.
Setting up a Nextcloud cloud instance can be as complicated as you want it to be, but this guide aims to demonstrate how easy it is to switch from commercial services such as Dropbox, Google Drive, iDrive, OneDrive and suchlike, to a cloud solution which you have complete control over.
As such, both methods discussed below are hosted. That is, the Nextcloud instances are installed on remote servers.
Setting up a fully hosted Nextcloud account
The idea of setting up your own cloud storage might sound scary, but the Nextcloud desktop software makes it extremely easy. If you can set up a Dropbox account, then you can set up a fully hosted Nextcloud account.
Nextcloud has partnered with a number of cloud storage providers who will set up and manage a Nextcloud instance for you. Most of these offer a free trial tier with limited storage, which can be expanded for a fee.
You should be aware, though, that "personal” Nextcloud accounts are managed entirely the provider. In addition to the privacy implications (the provider has full access to your files and account data) most of these accounts come with a limited feature set which is determined by the provider.
These accounts generally provide everything most people need from a personal cloud service, including a photo gallery and music player, but may not offer more advanced features such as file versioning and end-to-end encryption.
In most cases, rather than simply expanding storage, it is possible (for a fee) to upgrade these "personal "accounts administrator accounts. Once you have administrator access, you can tinker to your heart’s content and add whatever features you like by installing the relevant Nextcloud app.
Just be aware that the account provider still also has administrator access to your account, although the privacy implications of this can be heavily mitigated against by enabling end-to-end encryption.
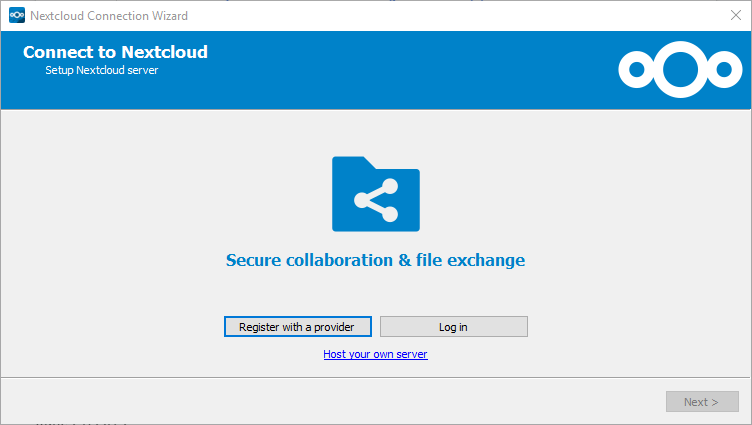
1. Download, install, and run the Nextcloud desktop client or mobile app for your platform. In this tutorial, we’ll use the Windows app, but the process is essentially the same on all platforms.
2. Select "Register with a provider.”
3. Enter your email address and pick an account provider. The software will recommend one for you, or click "change provider” for a list which prioritizes services close to your geographic location (or if you are using a VPN, your apparent geographic location!).
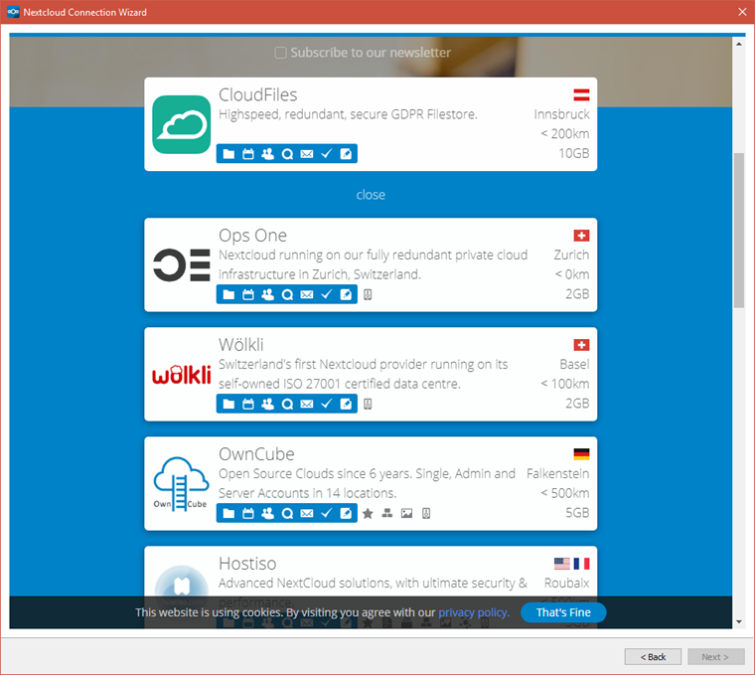
For this tutorial, we chose OwnCube because the 5GB free personal account is quite generous, and we prefer servers based in Germany to Austria on privacy grounds.
Once you have made your selection, you’ll need to agree to Nextcloud’s Terms of Service before you can click "Next.”
4. Decide which folders you would like to sync to your computer from the server, and which folders on your PC you would like to sync to the server.
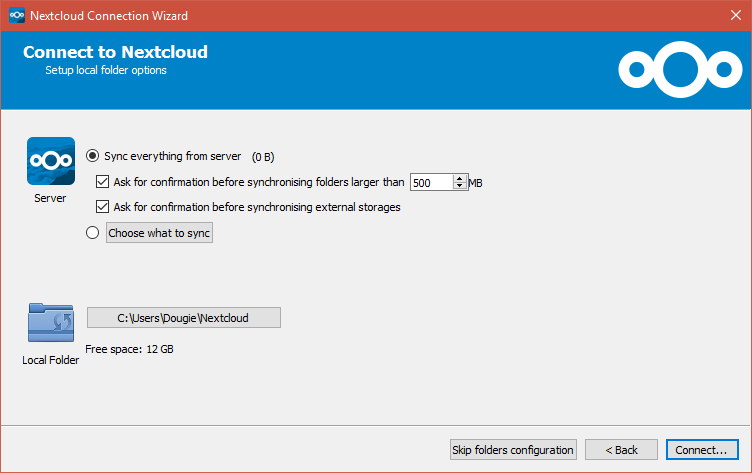
Hit Connect… when you’re ready. And that’s all you need to do. We said it was easy!
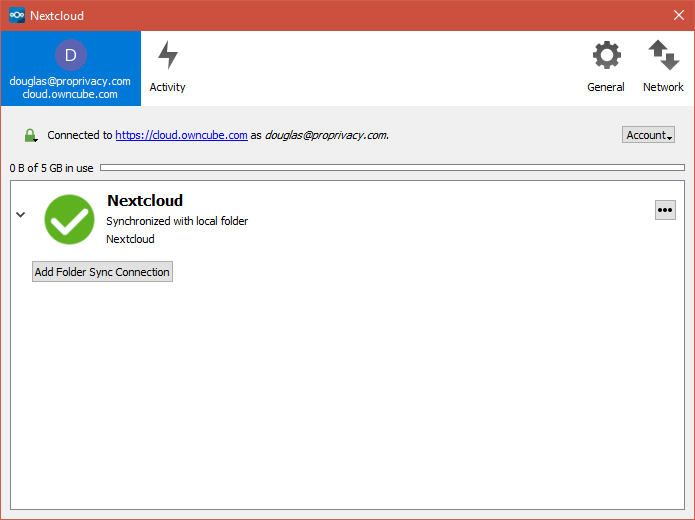
Your provider will email you confirmation that your account has been created and provide the server address and login details you will need to access the web portal and link apps on other devices.
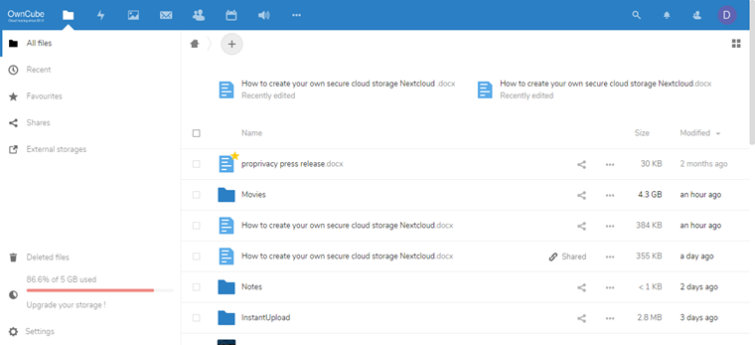
The first thing you will probably want to do is log in to the web portal in order to explore the full range of features available to your account.
Creating a Nextcloud instance on a remote server
Although very easy to set up, a fully hosted account like the one discussed above means that you do not have complete control over your own cloud. It is managed for you, even if you have paid for administrator access.
If you want complete control (which is, after all, the main appeal of Nextcloud in the first place) then the easiest way to do it is using the Nextcloud web installer.
1. Purchase some server space. In theory, you can use a free server account, but in researching this article we found very few free accounts that matched the Nextcloud server system requirements. Do please check that any service you sign-up for matches these requirements.
2. Download the nextcloud web installer file, setup-nextcloud.php.
3. Login to your server’s control panel and navigate to the File Manager page. Click on the Upload button and select the setup-nextcloud.php file you downloaded in the last step. These details may vary a little by web hosting provider but are generally very similar.
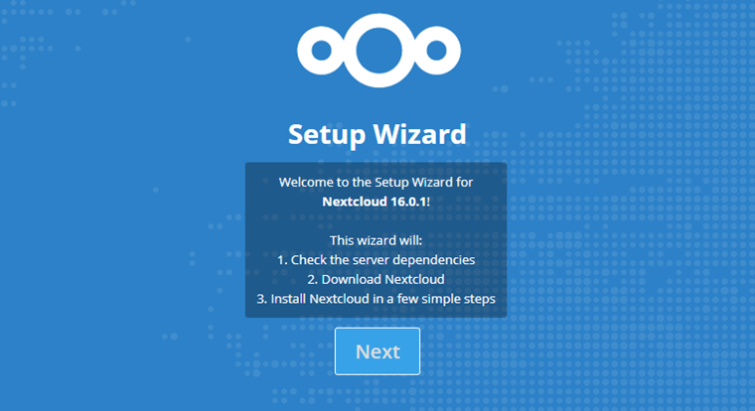
4. In any browser, type in the URL: www.[yourdomainname.com]/setup-nextcloud.php (replace [yourdomainname.com] with your own domain name, obviously) to open the Nextcloud setup wizard. Hit Next.
Note that if you uploaded the setup-nextcloud.php file to a subdirectory rather than the root directly then you will need to add the full path to the URL.
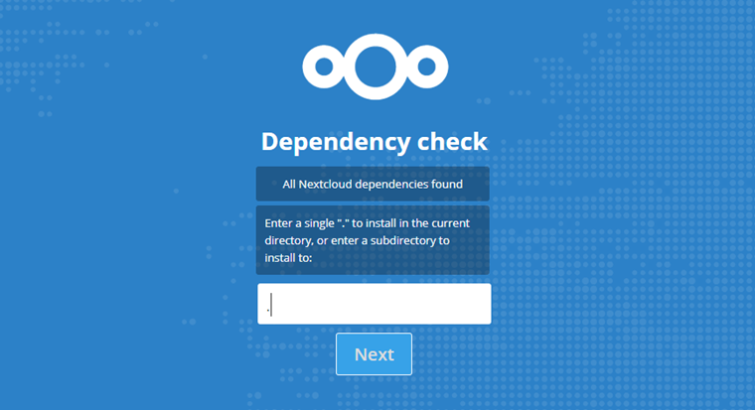
5. Nextcloud will run a check to ensure all the dependencies it needs are available. This may take a few minutes. You can then install wherever you want. We are happy to install in the current root directory, so we enter ".”. Hit Next.
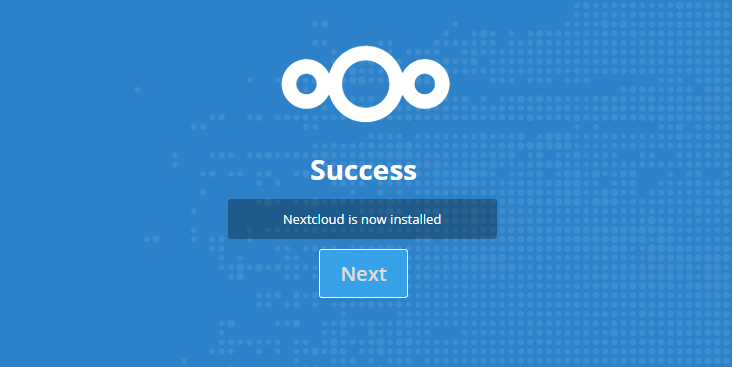
6. After a few moments, you should receive a message telling you that installation is successful. Now hit Next.
7. You will need to create an admin username and password which is used to login into your new cloud. When you’re done, Finish setup.

We’ve taken heed of the performance warning and will upgrade our SQL library!
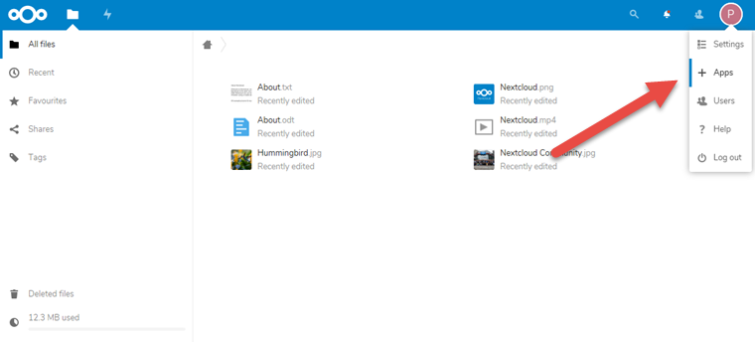
8. Enter your domain name into your browser’s URL bar and log in using the credentials you just created. When you first log in, the console will be very bare, so to add features head to the Account icon in the top right corner -> Apps.
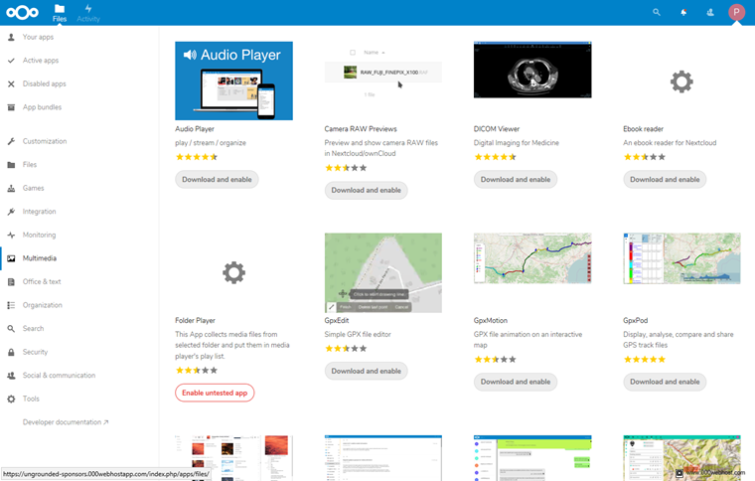
9. Look through the list of apps and Download Enable any that you like the look of. If you can’t find what you are looking for, then use the handy Search function.
And you’re set! There are, obviously, a ton of options you can play around with as administrator, but these are beyond the scope of this tutorial.